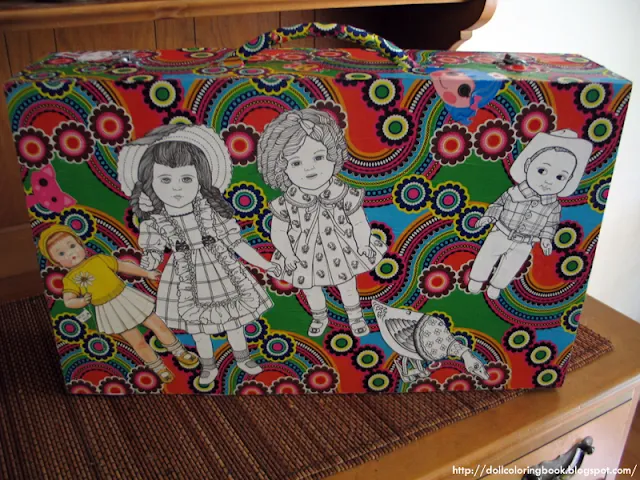
Once you have begun to collect, craft, and keep your paper dolls, there always will remain the problem with storing them properly. Most children can feel a bit overwhelmed with the prospect of cramming their delicate creations into an old desk or sliding these haphazardly under a bed and we all know that there can be all kinds of dusty sticky disasters underneath a child's bed! So what is a little, budding artist to do?
First, I suggest that whatever is under that bed or in that desk should be cleaned out and if it can not be organized in some fashion, throw it a way! Second, devise a plan to decoupage a few excellent boxes, wooden or cardboard, for the storage of finished paper dolls only. This project will present many opportunities for your little one to organize their creativity and play. A Clean, well organized work space makes for a happier learning environment. Also the particular attention given to completed crafts or artworks will teach your child to better appreciate their own work and respect the work of their peers as well.
I often scour second hand shops for items such as wooden boxes to repurpose for crafts. There is no good sense in paying more for containers than one must, especially if these are to be made over anyway. Look for well built, strong storage boxes. The one I am using here has a handle; this makes it easier for a child to carry and to slide in and out from under a bed. He or she may also carry it along on a trip somewhere to play with or work on it's contents. Crafting paper dolls is a fun and affordable activity for young children to take along with them during summer vacations or most important, when they pay a visit to a grandparent's home overnight or for the weekend.
To découpage a wooden box similar to the sample I have photographed here, you will need the following supplies: Modge Podge, a soft bristled brush or sponge, scissor, bright, colorful wrapping papers, paper dolls colored and uncolored, a recycled wooden box is preferred, sand paper, a sturdy, well built cardboard box (if there is no other available wooden box).
You may also wish to think about collecting a few things for the interior of the box to help the child organize his play habits or crafting impulses as well. Things like: accordion files, small boxes and a few craft supplies, although it may be best to give him/her an additional container for the craft supplies apart from the storage box in order to prevent spillage or accidental mess.
Step-by-Step:
- Sand lightly the surfaces of your box that you wish to cover with paper. This will greatly improve the adherence of the glue.
- Cut and measure your wrapping paper to fit the box, both inside and out. If your child is very young, you may need to do this part of the craft before-hand for them.
- Cut out the images of paper dolls that you wish to apply over the surface of the background as well.
- Apply a layer of Modge Podge to the lightly sanded surface of the box before layering the background paper. Smooth the papers down with your clean hands as you go adding an additional coat of glue between every new layer of pictures you put on the surface of the box.
- If the paper puckers a great deal, this may be because it is very thin. I used wrapping paper for my background application. The wrinkles disappeared as the paper dried. I also simply applied my paper doll cut-outs over any small rips so these would not show, adding more Modge Podge to the surface as it dried and as I applied.
- Proceed to brush on the final layer of Modge Podge to the finished surface to seal it properly.
 |
| I chose to découpage an old wooden carrying case for a little girl's paper doll collection. This case will slide in and out from under a bed nicely. |


No comments:
Post a Comment
Thanks for your thoughts. All comments are moderated. Spam is not published. Have a good day!