Friday, July 12, 2019

Learn About The Family Business and Food Allergies With Blaire Wilson

5 Fun Facts about Girl of the Year 2019 - Blaire Wilson

       Blaire Wilson is the seventeenth Girl of the Year, released on January 1, 2019. Hailing from the fictional town of Bluefield, New York, Blaire lives on her family's sustainable farm, which also includes a farm-to-table restaurant, B&B, and special event barn venue. She loves to cook and craft, but struggles with newly-diagnosed lactose intolerance and her smart device addiction. She has a paler skin tone compared to other fair-skinned dolls, and uses the Josefina face mold. 

Learning With Blair Wilson: American Girl Doll of the Year for 2019
Our Artifacts for Lapbooks and Journals About The Blaire Wilson Doll:
Online Research for American Girl Blaire Wilson:
Family Farms:
Bed and Breakfast Retreats:
Lactose Intollerant:
State or County Fairs:
Barn Wedding Venues:
Blair Wilson books:
  • "Blair"
  • "Blair Cooks Up a Plan"
Fan Video Pics for American Girl Doll Blaire Wilson:

Learn to Follow Your Dreams in Gymnastics With McKenna Brooks

The American Girl "McKenna" book.
       McKenna and her collection debuted in January 2012, revolving around a gymnastics theme. She is a ten-year-old girl from Seattle, Washington who is a budding gymnast but suffers from problems with school work. McKenna is the oldest of three children, with younger twin sisters named Maisey and Mara Brooks. She is described as strong-willed and determined, and is determined to be an Olympic gold medalist for gymnastics.
       A television film entitled An American Girl: McKenna Shoots for the Stars was released on July 3, 2012. The film is also the second in the series to feature a Girl of the Year character. McKenna is portrayed by actress Jade Pettyjohn.
Our Artifacts for The McKenna Doll:
Online Research for Themes Covered in McKenna's World:
Children and Gymnastics:
McKenna has trouble in school: This listing is for parents, tutors and older kids to use in research.
McKenna learns to look past disabilities:
How to live with a broken limb:
Training a Special Needs Dog:

Tuesday, July 9, 2019

How To Build a Fireplace For An American Girl Doll House

Left, there is just enough space inside my faux fireplace to hold a "iron grate and some small wood logs.
I used a wooden picture frame to finish off the fireplace opening. Right, the height of my handcrafted
fireplace is perfect for all of our 18inch dolls; it measures 22" tall and 10" wide.
       In my humble opinion, a fireplace is one of the most romantic features of any home. That home could be for a doll but it could also be for a person. 
       Fireplaces for dolls are constructed with very strong cardboard or wood. I chose to build mine using old paper mache techniques that most older kids can certainly manipulate with only a bit of practice. 
       A fireplace may be any size or shape you desire; these come in as many materials as you can imagine! 
       If you look closely at my example, you can see that my stone-faced, 18inch doll fireplace is actually detached from any wall. I build my doll furnishings so that they may be conveniently packed away in storage. Free standing doll furniture is not only easy to store, but also easier to sell, move and manipulate into any photoshoot.

Click to see stonework details.
Supply List:
  • plastic knife
  • cardboard
  • small sample tiles
  • white, yellow and black acrylic paints
  • Gorilla glue
  • stain for the wooden mantle
  • brick
  • wooden picture frame
  • wood for mantel
  • Claycrete paper mache
  • Mod Podge 
  • clear acrylic sealer (spray or liquid)
  • wood glue or Gorilla Glue
  • sponges (optional)
Step by Step Instructions:
  1. First I had to decide on a standard height for an 18inch doll house room that I would be constructing for photography purposes in the near future. 
  2. Then I measured and cut a wall suited to those measurements. 
  3. Using wood glue, I attached a shallow heavy cardboard box to the cut wall and covered the form entirely with masking tape.
  4. Then I cut a mantle made from wood and adhered it to the top of my shallow box with wood glue. 
  5. I weighted this mantle board down with a brick and let the glue dry for several days before staining it.
  6. I then cut a floor board to attach at the bottom of my fireplace so that I could tile the floor a few inches in the front of the facade.
  7. I glued the tiles down all a once because I purchased these on a small mat. Then I applied my grout and wiped away the mess with a sponge and water. 
  8. I let the grout dry over night.
  9. Then I cut away the lower half of a simple, wooden picture frame. And glued this to the opening of my firebox. I weighted this down and gave it time to dry.
  10. Finally, I was ready to mix the Claycrete and mold it into a stone pattern around the front and side surfaces of my doll fireplace.
  11. After letting this stone surface dry for a couple of weeks, I then painted it a dark grey entirely.
  12. Then I mixed several lighter grey colors and dry brushed these alternately across the surface of my stones to give them dimension. If you are not familiar with this technique, I would suggest you use a dry sponge to work the paint in and out of the surfaces. instead.
  13. When you are satisfied with your paint work, seal all the surfaces with a acrylic spray fixative.
Left and Center, I attached a shallow heavy cardboard box to the cut wall. Right, I weighted this mantle
board down with a brick and let the glue dry for several days before staining it.
Left, you can see the brick at the top weighting down the mantle till it dries. Center is a close-up of
the wooden picture frame used to trim out the facade of my fireplace. Right, I've used a bit of wood
 putty to fill in cracks around the frame.

Here are some shots of the stonework as I molded it with my hands and a plastic knife. It is a very simple
 process; just mush it on and flatten it out a bit as you go. These are only rocks after all!

Above is the decorative wire soap dish used
here for faux fireplace grate.
        I found a small soap dish that reminded me of a cast iron fireplace grate at my local thrift shop. As you can see on the right, it also has a daisy motif on the front of it. Then I stacked small wood stems on top of it. These stems are frequently sold at our dollar store down the street. If you can't find these, just cut up twigs from your lawn after a storm to make convincing logs for your doll's fireplace instead.

More Fireplace Crafts for 18inch dolls:

Sunday, July 7, 2019

Transforming a Bistro Chair for A Desk Set

       This particular chair comes from the Journey Girls bistro table and chair set originally. See the whole set at the My Journey Girls Adventures here. I decided to transform it with a bit of orange spray paint and a new seat cushion cover. I will use it in a doll bedroom for a desk chair in a future post.
I picked up this stray plastic chair at resale for a dollar. I needed it for a doll's desk 
attached to the front end of a large bunk bed suite. These bunk beds with a 
built-in-desk are sold at Emily Rose here.
          The new fabric for the seat cushion has the colors that I am using for the doll bunk beds: brown, white, orange and pink.
Although I like the teal color of this former bistro chair, it will not blend in with my doll's bedroom suite.
        Above I show how easy it is to take the plastic chair apart before painting the chair and recovering the seat cushion.
The plastic chair looks rustic once painted. The seat cushion's colors blend in 
with the blankets and sheets that I am sewing for the bunk beds.
       I used an orange spray paint designed to cover plastic to change the faux iron rod look of the chair legs, back and seat. 
       Then I cut a circular piece of fabric and sewed a straight seam around it's parameter in order to pull it taunt over the chair pad and around to the backside of the seat. The gathering was concealed underneath the chair cushion after I reattached it to the chair base. I used a generous portion of hot glue to put the cushion back onto the seat as well.

How to fix floppy necks on dolls...

       Here is a common problem with some dolls. You found the perfect doll at resale but . . . it's torso doesn't support the head. Your doll has floppy neck or floppy head syndrome! No kidding, that is what the condition is called.
       This is a result of either poor construction or the use of the wrong material. I recently purchased a doll with this condition for a few dollars. It was very easy to fix simply by replacing the materials that were used to stuff her body.

I didn't hesitate to buy a new doll with floppy head. Her condition was easily corrected by
replacing her new stuffing with cotton. Polyester fiber is too soft for a 18inch child doll.
       The manufacture had stuffed her torso with polyester fiber, a material often used in the filling of baby doll bodies, to give them extra softness. This is preferred when the doll is representing a new born infant, because that type of doll is usually carried non-stop and suited to a small cradle.
       However, for a free standing, 18 inch, child doll, this material is not a good choice. The doll will always be too limp to stand on her own. Thereby, making her an unattractive, inexpensive alternative to the pricier American Girl doll standard. 
       So, I opening up her fabric torso with a seam ripper and removed all of the polyester fill before replacing it with 100 percent cotton batting; this is the fill that resolved this new doll's floppy neck. Then I stitched up the opening in her back using a invisible hand stitch. She is now better than new.
       Now you'd think that a manufacture of dolls would know better, right? They do, however, if they are purchasing materials in bulk from one source, they can do so at a lower price point and this is what most likely took place.
       In case you are wondering if you could do the same by using half polyester and half cotton, don't bother. The doll's body will eventually collapse again. The polyester does not compact enough inside the torso to make it stiff. Fill the doll with tightly compressed cotton balls or cotton batting and you will never have the problem again.

Fixing Floppy Necks:

       I added the softer polyester fill beneath the neck of both the porcelain and vinyl versions of my 
Bello baby dolls. Although my investment was only a few dollars, my fondness for these 
twin molds was too great to allow them opportunity for damage I could not repair.

        What child or adult could resist these little faces? Baby dolls by Venezuelan designer, Yolanda Bello, in the 1990s, are notorious for their fragility. Their bodies were stuffed with pellets and polyester fill so that they would feel limp like newborn babies. However, this also meant that the porcelain versions were not likely to survive outside of a curio cabinet, even in the arms of an adult.
       Ashton Drake also sold identical designs in vinyl materials, so that parents had the option of giving a durable doll to a child. But their bodies had little stuffing about the neck and shoulders as well and even if the doll's heads were no longer breakable, the bodies of these dolls could be easily torn and tattered within a short duration of play.

Saturday, July 6, 2019

Vinyl Clip Art Records for Doll Crafts

       A phonograph record (also known as a gramophone record, especially in British English, or record) is an analog sound storage medium in the form of a flat disc with an inscribed, modulated spiral groove. The groove usually starts near the periphery and ends near the center of the disc. At first, the discs were commonly made from shellac; starting in the 1940s polyvinyl chloride became common. In recent decades, records have sometimes been called vinyl records, or simply vinyl or even vinyls. Read more...
       Cut and paste these albums/records back to back or sandwich a piece of light weight cardboard between two sides, if you would like your doll's records to be sturdier for play. The following clip art is intended for child crafts and play. It is not to be redistributed from any other website or sold for profit.
Printable 12-inch LP Vinyl Records with colorful labels.

Printable 45 RPM vinyl records with colorful labels.

Thursday, July 4, 2019

DIY Patriotic Pinwheel Cookies for American Girl Dolls

You can cover a small box with white typing paper, and tie the lid shut with white twine,
 to make your cookies look like they were purchased fresh from Grace's French bakery.
Because red, white and blue are also the colors of Great Britian's and France's flags,
our pinwheel cookie crafts would also be fun to include in a doll bakery overseas! 

        Above is a fresh baked box of patriotic pinwheel cookies for our American Girl dolls to share at their 4th of July picnic. These are easy to craft with just a small amount of oven bake clay. To make the process even faster, purchase colored clays in advance. If you are frugal like me, suffer through the process of mixing the red and blue to avoid holiday traffic!

Don't forget to throw away the sticky, clay mess left on the wax paper as soon as you have 
rolled it out with a glass! I doubt that this stained clay can be washed from any kind of fabric.

        You can color white Sculpey by kneeding in acrylic paints. It's a very messy business so I don't exactly recommend the process if you can purchase factory colors. Above you can see that I was able to combine the acrylics with the oven bake clay to create some relatively bold colors. Make sure that if you choose to do this, work on top of wax paper and when you roll it out with a glass, sandwich the clay between wax papers.
       Roll out the colored clays: red, white and blue and stack these on top of each other. You can stretch out the clay a bit to ensure that there is equal coverage for all three before rolling these up together.

It isn't necessary to compress the clay much as you roll it out. Just tap it down slightly 
to remove air bubbles.

        On the left you can see that I am rolling all three colors into a log. On the right my log is ready for cutting.
I gently pressed out the edges of each doll cookie to make them look more life-like,
 before baking them.

       Above and left, I cut consistent sized cookies with a knife and layed these out on top of a cookie sheet and baked them at 275 Fahrenheit or 135 Celsius for 5 - 8 minutes. Sculpey is best baked when it is allowed to heat up with your oven and cool down slowly without the oven door ajar.
       After my pretend doll cookies cooled, I brushed them with white glue and rolled them in transparent glitter to mimic sugar.
       These pretend sweet treats will be much appreciated by little mothers in their play doll bakery.

18" Doll Size Patriotic Pinwheel Craft

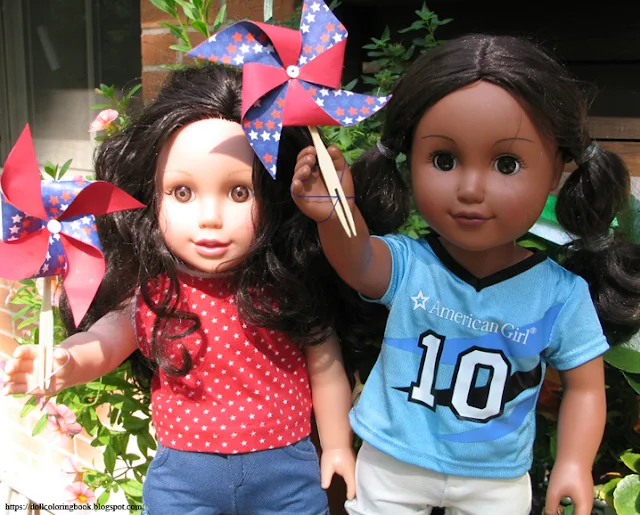
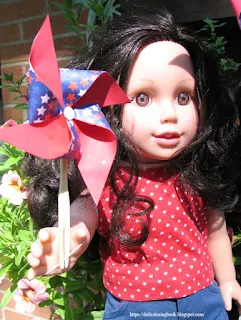
Our dolls are going to carry their very own red, white and blue, windmills in a 4th of July parade!

        Here is a simple and fun craft that you can make in only a matter of minutes for your favorite American Girl Doll. Using supplies you already have tucked away in a general craft supply at home follow the instructions below. Now your doll can have something to carry in a parade while you carry her!

One side of the pinwheel is solid red
paper, the other side is a red, white
 and blue star pattern.
 Craft Supplies:
  • scissors 
  • decorative patriotic scrapbook papers
  • hole punch 
  • double prong tooth picks
  • hot glue and hot glue gun
  • ruler
  • tiny rubber bands (for display)
  • white tacky glue
  • pin or thumb tack (for pinwheels that move)
  • left or right handed scissors (Match the correct scissors to the dominant hand of your child please.)
Step-by-Step Instructions:
  • First you will need to measure and cut four squares from scrapbook paper measuring three inches on all four sides.
  • Two of the those squares may be a solid color and two should be patterned. We used red, white and blue to emphasize the fact that these paper windmills are for a 4th of July celebration.
  • Glue two squares together with the alternate pattern and solid coupled as a pair.
  • Now fold the paper squares from corner to corner in half.
  • Then fold those triangle shapes from corner to corner in fourths
  • Open up the squares and measure 1 1/2 inch from the centers out along the folded lines with a light pencil mark.
  • Use your scissors to cut from each corner in up to the marking.
  • Fold in every other corner, tip to center point and glue.
  • Repeat this step four times.
  • You should have a pinwheel shape.
  • Punch out two centers using your hold punch and paste these to the center of each pinwheel.
  • Now hot glue each of your pinwheels to a double prong tooth pick for your dolls to carry in a 4th of July parade. (This version doesn't spin)
  • If you want your pinwheel to actually spin in a breeze, you can poke a pin through the center and then attach the pinwheel to a straw or pencil using a pin or thumb tack.
You can use a tiny rubber band to help hold the windmills in the palm of your doll's hand.

DIY Doll Sized Rockets for 4th of July!

Our dolls are seated on the lawn along with our homemade rockets, waiting for their American 4th
of July picnic to begin. However, many other countries celebrate important holidays and special
 occasions with fireworks just like Americans. If you have a doll collection from a different country,
 you might also like to make pretend fireworks for doll play

       Our dolls have decided to have a 4th of July picnic on the lawn today. They can't wait to play with their pretend rockets! 
       You can make doll fireworks just like ours using recycled paper tubes and skewers that are commonly found in supermarkets among the barbecue supplies.
       Be careful, though, not to let young toddlers or baby brothers and sisters play with these sharp ends. I clipped mine off a bit but these are certainly not the kinds of toys for little ones to run around with! They do make cute photo opportunities for the dolls however.

Paper mache rockets in the lawn
 for festive decoration only.
 Craft Supply List:
  • cardboard tubes (variety of sizes)
  • decorative, patriotic scrapbook papers
  • white school glue
  • hot glue and hot glue gun
  • newsprint
  • wooden skewers
  • twine
  • sheets of foam and card stock for rocket tops
  • masking tape
  • left or right handed scissors (Match the correct scissors to the dominant hand of your child please.)
Step-by-Step Instructions:
  1. Cut the cardboard tubes into a variety of lengths.
  2. Crush the newsprint and use masking tape to attach the ends of the newsprint to each skewer. 
  3. Wrap the ends of each skewer with the newsprint, approximately 1 - 2 inches from the end so that the skewers fit snuggly inside each cardboard tube.
  4. Drizzle some hot glue inside each tube and stuff more newsprint around each skewer to fill up the hollow insides of each 'rocket' firmly with paper stuffing.
  5. Use masking tape to close both the top and bottom of each tube.
  6. You can poke a hole using a toothpick or pin to insert a piece of twine to act as a pretend fuse.
  7. Wrap each tube with decorative paper and white glue to make the rockets festive looking.
  8. Cut circles measuring approximately 1/3 to 1/2 inches larger in diameter than the openings of your tubes.
  9. Now  cut a pie shape from each circle. (see photo below)
  10. Using a bit of hot glue on the cut opening carefully pull and attach each end to overlap slightly. This will create a pointed-end-caps for your rockets. You can use either foam sheets or card stock to shape these caps.
  11. Attach the end-caps to each of your rockets with hot glue.
  12. Twist more decorative paper around the skewer end using white glue to add more detail if you'd like.
  13. After your pretend rockets have dried, stick them into the lawn and photograph your dolls enjoying their 4th of July picnic.
Far left, Cut the cardboard tubes into a variety of lengths. Center, stuff more newsprint around
each skewer to fill up the hollow insides of each 'rocket' firmly with paper stuffing. Right,
Wrap each tube with decorative paper and white glue to make the rockets festive looking.
Left, Now  cut a pie shape from each circle. Right, Using a bit of hot glue on the cut opening
carefully pull and attach each end to overlap slightly.
Our dolls prepare for their very own 4th of July Celebration.

Wednesday, July 3, 2019

Learn About St Louis, Mo and Rainforests with Lea Clark

"Lea to the Rescue" movie for
American Girl fans
       Lea Clark is the fourteenth Girl Of The Year, released in 2016. Debuting in an episode of Good Morning America, Lea is a budding photographer from St. Louis, Missouri, and is described by American Girl as an animal lover who "discovers a world of possibilities" upon visiting Brazil, culminating in a visit to her brother in the Amazon rainforest.
       Coinciding with her release is a film entitled Lea to the Rescue starring Maggie Elizabeth Jones as the title character, along with coordinating items such as books penned by Lisa Yee entitled Lea Dives In, Lea Leads the Way and Lea and Camila, and a mobile game for iOS. American Girl has also launched an advocacy campaign with the World Wildlife Fund called "Wild at Art", urging young girls to contribute to the fund through their artistic abilities.
Our Artifacts for the Lea Clark Doll:
  1. The Jungle
  2. Jungle Animals
  3. People Who Live in The Jungle
  4. The Jungle "Maloca"
  5. The Jungle Hunt
  6. Jungle Farming and Foods 
  7. Jungle Medicine Past and Future 
  8. The Jungle Dance 
  9. Jungle Crafts
  10. Lea Clarks Behia Berry Fruit Stand - replacement accessories are coming soon!
Online Research for Themes Found in Lea Clark books: Kids Can Learn Photography:
Rain Forests of Brazil:
Endangered Animals in The Rain Forest:
Tour The City of St. Louis: Most of the attractions in St. Louis are free of entrance fees, curtesy of the St. Louis taxpayers.
American Girl Lea Clark's Books:
  • Lea Dives In
  • Lea Leads the Way
  • Lea and Camila

Learn About The Arts with Saige Copeland

Saige books by Jessie Haas for American Girl.
       Saige Copeland is the eleventh Girl of the Year released by American Girl in 2013, and the fourth Girl of the Year to represent an only child. A resident of Albuquerque, New Mexico, she has a passion for visual arts (most especially painting), and is very skilled in horseback riding.
       When Saige comes back to school, she learns that there will not be a new art class. Saige gets upset and tries to keep up her spirits and earn a new class for the school.
       A film based on her stories, Saige Paints the Sky, was released on July 2, 2013 as a made-for-television film. It aired on NBC on July 13, 2013. Saige was portrayed by actress Sidney Fullmer. An iOS app entitled Paint Ponies was also released to coincide with the doll's debut.
       The Saige doll has light skin, freckles across the bridge of her nose, blue eyes and loose auburn hair that comes in a braid. She comes in an indigo dress with a knitted/sewn geometric print belt and tan boots with belting and her face mold is the Classic mold.
Our Artifacts for The Saige Doll:
  1. Craft Small Award Ribbons
  2. Different Kinds of Balloons and Their Uses
  3. Cut blanket ponchos for 18" dolls - These have a Southwestern motifs.
  4. Dollhouse prints for horse loving dolls by Martin Stainforth
Online Research for Themes Found in Saige Copeland Books:
Balloon Festival:
Overcoming Stage Fright:
Fund Raising: 
The Importance of Supporting Art Programs for Kids: