Saturday, August 4, 2018

Collecting Rugs for Your Doll's House


       Covering the floors of your doll house may seem a tedious prospect if you believe that these must always be handcrafted by yourself. 
       In truth, the successful decorating of a doll's house may have more to do with your ability to reinterpret the use of items that are already in your actual home, objects such as placemats for example. Placemats come in all kinds of textured surfaces and are produced in a wide range of color combinations. Some of them are woven from grass, others are printed on cotton. If purchased from a department store, placemats come with finished edges too. Find the perfect placemat and you've found a Barbie sized rug that you need not alter in the least, unless you want to. 
       I have even found smaller bath mats in dollar stores that look exactly like sophisticated area rugs when displayed inside a doll's house. 
       Often I use one item in a doll's room to imagine additional furnishings that would normally accompany it, if it were included in an actual adult sized space. If I had this rug on the floor, which couch or bed would go best with it and so on...
       Placemats are best purchased for a doll's house when they are most affordable. These are frequently tossed on clearance tables in stores and sold for pennies on the dollar at the end of a season. You can pick them up at a thrift stores and garage sales as well.
       An unfashionable placemat may make a far more attractive rug for your doll. I have frequently discovered that things considered ugly when designed for one use, become marvelously unique when repurposed for another.
       So take your little ones shopping for these affordable area rugs this weekend. They'll enjoy the novelty of the hunt and you will enjoy less money spent!
      

Distressing a Sideboard or Buffet for Barbie & Family

       This old, discarded jewelry box will fit into our doll's dining room perfectly. Our twelve inch dolls will love displaying holiday dinner selections on this upcycled, sideboard for all their friends to admire. The grey distressed paint on this pretend sideboard looks classy in a formal dining room setting too!

How do you best determine which jewelry box will fit into your doll's house? Take a tape measure with you on your
 shopping trip. A real sideboard and/or buffet stands approximately four to five feet tall, depending on the age and
style of the piece. The jewelry box pictured here is approximatly 5 1/2 inches. So, my 11 1/2 inch fashion dolls look
just fine standing next to it. It is a bit wide for an actual sideboard but I don't mind the extra width; I will have more
 room for the display of dishes and food items in the end.

       A sideboard, also called a buffet, is an item of furniture traditionally used in the dining room for serving food, for displaying serving dishes, and for storage. It usually consists of a set of cabinets, or cupboards, and one or more drawers, all topped by a flat display surface for conveniently holding food, serving dishes, or lighting devices. The words sideboard and buffet are somewhat interchangeable, but if the item has short legs, or a base that sits directly on the floor with no legs, it is more likely to be called a sideboard; if it has longer legs it is more likely to be called a buffet.

Supply List:
  • sandpaper
  • masking tape
  • grey acrylic or enamel paint
  • paint brushes
  • acrylic clear sealer
  • old, dark stained jewelry box
  • terry cloth
Step-by-Step Instructions:
  1. Rub down the surfaces of the jewelry box with an old terry cloth towel. Make sure that you remove dust and dirt from the box's surfaces.
  2. Wrap the handles of the box doors with masking tape in order to protect these from paint.
  3. Brush on one layer of enamel grey paint.
  4. Let the paint dry thoroughly.
  5. Use a relatively smooth sandpaper to remove paint from the edges and some flat surfaces of the jewelry box.
  6. How much paint you remove is entirely up to your own sense of taste. You want the surfaces to look older and worn, as though the piece were an antique.
  7. Rub down the box again with a towel to remove sawdust.
  8. Seal the "sideboard" or "buffet" for your Barbie's dining room with clear acrylic.
Above you can see my doll sideboard from different angles and up close.
More Doll Furnishings from Transformed Jewelry Boxes:

Friday, August 3, 2018

Use Vintage Display Box for Barbie's Living Room

A glass and brass vintage display box in the shape of a
hexagon. Sometimes these were used for jewelry or as
miniature terrariums in the mid 1970s.
        I picked this vintage glass display box from the 1970s at a local Goodwill. I thought it would make a lovely sofa table in our doll's house. Little ones can display whatever treasure they think their dolls would enjoy inside of it.
       I cut a clear plastic sheet, the same size of my box/sofa table by tracing around the top of the box with a marker and cutting out the shape  slightly smaller. Then, I hot glued the shells onto this plastic hexagon in order to keep them in place. When the dolls tire of their beach themed living space, their child mothers may change out the displays for something else like flowers or holiday decorations.
       Some parents may believe that the fragility of such a item will not suit for a younger girl or boy of three or four. However, I believe that it is good to give children six to eight years of age the opportunity to handle and care for some fragile items. Small responsibilities that can bring no serious harm to others but that still require special maintenance, will help grow an appreciation for property in your child. Once they prove that they can be trusted with small things, parents may then increase their levels of responsibility for other items in the home. The child's personal play space is the perfect place/opportunity to begin training them in responsible behavior.
A special display box, small enough for a doll's house, affords an opportunity to introduce concepts
 like discipline or appreciation in order to keep a fragile thing safe. Your child may also begin to
 take notice of the world around herself; she could also be encouraged to record details or make lists
of those things connected to themes in order to include them in her displays.

In the 70s, people also used these boxes as terrariums. Parents can help their little ones to grow a miniature garden
inside the glass display for their child's doll room or doll house alternatively.

DIY Pool Floats for Your Doll

This inflatable, Barbie pool with solid colored pool floats dates from the mid seventies. It is in excellent condition.
The straw float craft is an easy one, but like most of the crafts included here, children need adult supervision to complete it.
        Now is the time for having some fun in the sun with your dolls! Above is an inflatable pool and blue floats from my childhood collection. The straw floats with alternating colors are easy to make at home. But you will need adult supervision because these are melted together using a hot iron.

Supply List:
  • drinking straws
  • parchment paper (to protect the iron and other surfaces from melted plastic)
  • iron and ironing board
  • scissors
  • clear plastic bags (this will act as a layer of glue)
Step-by-Step Instructions:
  1. Choose a pattern you would like for the pool floats. I alternated purple and green straws for one pool float and teal and red straws for the other.
  2. Heat up your iron to it's highest temperature, and ask your parent to watch and help you in your progress.
  3. Lay a sheet of parchment paper on the ironing board. The parchment will separate the straws from the hot iron and keep the appliance clean from melted plastic. The parchment is very necessary for this craft.
  4. Lay the straws side by side and then layer a sheet of plastic bag on top of the straws and fold the parchment paper over the straws before pressing them with the hot iron.
  5. Press down on top of the parchment with the hot iron. It only take a few seconds to melt the straws together.
  6. Now lift the parchment and remove the melted straws carefully.
  7. Turn off the iron.
  8. Trim the excess plastic around the edges of the straws. Turn the straws over; the front side of your melted straws should not appear melted.
  9. You can trim the edges of the straws with scissors if these are uneven.
  10. Now your 12" dolls have new floats for the pool to play with!
Left, fold the parchment paper over the straws before pressing them with the hot iron. Center, Trim the excess plastic
 around the edges of the straws. Turn the straws over; the front side of your melted straws should not appear melted.
Right, Now your 12" dolls have new floats for the pool to play with!

Thursday, August 2, 2018

Retro Tinsel Trees For a Doll's Christmas

Right, I trimmed my retro Christmas trees with old Mardi Gras beads. Right, The silver tree is
 trimmed in purple, pink and silver Mardi Gras beads and the gold tree is trimmed in red, green
 and gold beads. These beads add a professional looking, decorative touch to finish off this DIY
 Christmas project for Barbie's house.


       Adding both sparkle and glamour to your doll's surroundings for the holiday season doesn't need to cost much. You can create these retro metallic Christmas trees from cast off supplies that you can find in your home.
       I purchased the silver and gold stems from a dollar store and made my cone forms from a recycled cereal box!
       Finish them off by upcycling Mardi Gras bead necklaces and the caps from the empty spray paint cans.

 Supply List:
  • silver and gold metallic chenille stems (one full bag each)
  • large discarded, clean cereal box
  • masking tape
  • silver and gold metallic spray paint
  • hot glue and hot glue gun (recommended use for adults only)
  • plastic Mardi Gras beads
Step-by-Step Directions:
  1. Cut triangles from the cardboard cereal box. I cut one triangle lengthwise and the other across the width of my box in order to shape two different tree sizes.
  2. Roll these shapes into cone shapes and tape them firmly into place with the masking tape
  3. Draw around the bottom of each cone to transfer an accurate shaped circle onto the remaining cardboard scraps.
  4. Cut out a bottom circle for each cone from these measurements and glue them to the bases of your cardboard tree shapes.
  5. Spray paint each cone with silver or gold paint.
  6. Snip of the very tips of your cone shapes at the top so that you can insert a chenille, metallic stem into the whole before twisting it round the cone shape.
  7. As you twist the stems around the cones you will need to twist new stems to each end in order to create a continuous wrap. 
  8. Push the stems gently up the cones as you proceed so that there will be a nice thick layer of metallic branches around your retro Christmas trees.
  9. When you get to the base of each tree and all the surfaces have been covered, hot glue the final twists so that the wrap stays firmly in place.
  10. I hot-glued the caps of my silver and gold spray paint cans to the bottoms of each little retro tree to create metallic finished tree stand.
  11. Now cut the plastic Mardi Gras chains open and proceed to hot glue these around the retro trees as you twist them round each form.
Right, Cut triangles from the cardboard cereal box. I cut one triangle lengthwise and the other across
 the width of my box in order to shape two different tree sizes. Center, Here is what your cones
should look like. Right, Spray paint each cone with silver or gold paint.

Left, I hot-glued the caps of my silver and gold spray paint cans to the bottoms of each little retro tree
 to create metallic finished tree stand. Center, Snip of the very tips of your cone shapes at the top so
that you can insert a chenille, metallic stem into the whole before twisting it round the cone shape.
If you get tired of twisting the stems and need to take a break, you can tape a piece of masking tape
to the stem and cone to hold your place.

Wednesday, August 1, 2018

Christmas Yard Art for Your Doll House

       Wire frames like these are easy to find in thrift shops. I paid less than a dollar for each of mine. These are just the right size for standard sized 12 inch fashion dolls. Some of my packages have removable lids so that little ones can fill them with real gifts come Christmas!
We don't have any snow on the ground here in Missouri right now, so my garden evergreens will need to suggest the season.
Supply List:
  • wire sleigh and wire reindeer forms (found at resale shop)
  • Christmas wrapping paper or Christmas scrapbook paper
  • cherry red spray paint
  • red wire
  • gold beads
  • small cardboard boxes
  • Christmas Washi Tape
Step-by-Step Instructions:
  1. Wash the wire shapes, the sleigh and reindeer, with warm soap and water. Let them dry completely in the sunshine.
  2. Place both in a scrap cardboard box to keep your work place clean.
  3. I spray paint in the outdoors only. Read the directions on the spray paint can and follow them carefully.
  4. Spray an even coat of paint. Let it dry for twenty minutes and repeat several times. Turn the objects between paint applications in order to cover all the surfaces bright cherry red.
  5. Now you can wrap tiny boxes with Christmas paper and then decorate them with Christmas Washi tape.
  6. I also used a red wire and gold beads to randomly wrap the figure of the reindeer.
  7. Display this miniature yard art on the front lawn of your doll house whenever you'd like your dolls to celebrate Christmas.
Left, green wire sleigh. Center, spray painting the wire elements. Right, small, Christmas wrapped packages.
Left, a wire frame in the shape of a reindeer. Center, spray painting the reindeer. Right, the reindeer dry and on display.

Tuesday, July 31, 2018

Fancy's Resting-Places

       Most people, perhaps, can recall from their childhood the pleasure of cloud-gazing. The clouds are such strange-looking things, they change their forms so quickly, they seem to be doing so many things, now slumbering lazily, now rushing wildly on. Cloudland is safe away from the scrutiny of fingers, so we never can be sure what they would be if we got to them. Some children take fright at their big, strange forms and their weird transformations: but a happy child that loves day-dreaming will spend many delightful hours in fashioning these forms into wondrous and delightful things, such as kings and queens, giants and dwarfs, beautiful castles, armies marching to battle, or driven in flight, pirates sailing over fair isle-dotted seas. There is a delicious satisfaction to young minds in thus finding a habitation for their cherished images. (To project them in this way into the visible world, to know that they are located in that spot before the eye, is to "realize" them. In the sense of giving them the fullest possible reality.
       Next to the cloud-world come distant parts of the terrestrial scene. The chain of hills, perhaps, faintly visible from the home, has been again and again endowed by a child's fancy with all manner of wondrous scenery and peopled by all manner of strange creatures.  At times when they have shown a soft blue, he has made fairy-land of them; at other times when standing out black and fierce-looking against the western sky at eventide, he has half shuddered at them, peopling them with horrid monsters.
       Best of all, I think, for this locating of images, are the hidden spaces of the visible world. One child used to wonder what was hidden behind a long stretch of wood which closed in a good part of his horizon. Many a child has had his day-dreams about the country lying beyond the hills on the horizon. One little girl who lived on a cattle-station in Australia used to locate beyond a low range of hills a family of children whom she called her little girls, and about whom she related endless stories.
       With timid children this tendency to project images into unseen places becomes a fearful kind of wonder, not altogether unpleasant when confined to a moderate intensity. I remember the look of awe on the face of a small boy whose hand I held as we passed one summer evening a dark wood, and he whispered to me that the wolves lived in that wood.
       This impulse of timid children to project their dark fancies into obscure and hidden places often stops short at vague undefinable conjecture. "When (writes a German author) I was a child and we played hide and seek in the barn, I always felt that there must or might be something unheard of hidden away behind every bundle of straw, and in the corners." Here we can hardly speak of a housing of images: at such a moment perhaps the little brain has such a rush of weird images that no one grows distinct.
       The exact opposite of this is where a child has a very definite image in his mind, and wants to find a home for it in the external world. This wish seems to be particularly active in relation to the images derived from stories. This housing instinct is strong in the case of the poor houseless fairies. One little boy put his fairies in the wall of his bedroom, where, I suppose, he found it convenient to reach them by his prayers. His sister located a fairy in a hole in a smallish stone.
       As with the fancies born of fairy-tales, so with the images of humbler human personages known by way of books. Charles Dickens, when a child, had a strong impulse to locate the characters of his stories in the immediate surroundings. He tells us that "every barn in the neighborhood, every stone of the church, every foot of the churchyard had some association of its own in my mind connected with these books (Roderic Random, Tom Jones, Gil Bias, etc.), and stood for some locality made famous in them. I have seen Tom Pipes go climbing up the church steeple; I have watched Strap with the knapsack on his back stopping to rest himself on the wicket-gate." 

 from Science Friday

Monday, July 30, 2018

DIY Pet Beds for Your Doll's Dog or Cat

       Covering doll furniture with cotton and fabric is not as difficult as it looks. However, it does take a bit of practice and patience! After awhile you will get used to the process and improve greatly as you go. Start with something simple, like a tiny bed for Barbie's pets.
Barbie and Ken have many pets, so they need to have pet beds for both
dogs and cats.
These little cats sleep in the utility room so we've trimmed
out their bedding with yellow calico to match the decor of
the doll's utility room.

Supply List:
  • Calico scraps and matching felt colors
  • cardboard
  • hot glue and hot glue gun
  • needle and thread
  • oval sponge (one cut in half or two separate)
  • masking tape
  • four beads of equal size for each bed
Step-by-Step Directions:
  1. Purchase your round sponge first before cutting or measuring any of the materials for this project. I cut my sponge in half to make two beds. However, you may decide to use two separate sponges for each bed instead. Cutting a sponge in half is not very easy to do. 
  2. Choose your pet's bed fabric to coordinate with other furnishings inside in your doll's house if you like. 
  3. Place your sponge on top of a piece of cardboard and draw around the circumference of it. Now you can cut this oval shape out to use as both a pattern and a part of your pet's bed.
  4. To fashion the sides of the pet bed, cut a one inch strip of cardboard out and round off the corners a bit.
  5. Now tape and paste this strip to the outside edge of the cardboard base to form the side. Let this dry. Make sure to leave a space around one half of the pet's bed without a side. This will make the bed easy to get in and out of. (shown just right)
  6. Set your sponge onto the wrong side (A sewing term that means backside.) of the calico you have selected. Draw with a pencil around the edge of the sponge on top of the fabric. Now draw a second line approximately 2 inches away from this shape. You need to cut your fabric just a little bit larger than the actual sponge so that you can wrap the fabric and tape it in place over the top half of the sponge.
  7. Don't worry about wrapping your pieces to look clean where you will be putting hot glue anyway. 
  8. Now, wrap the cardboard pet bed in the same way, taping down the left over corners down to the inside interior of the bed. (see photo below)
  9. Hot glue the covered sponge into the covered pet bed frame. 
  10. Hot glue a oval piece of felt to the bottom of your pet's bed. (see photo below)
  11. Hot glue on four beads for feet. (see photo below)
  12. Sew seams down around the bed's wrapped edges if necessary.
Right, see how messy the inside of this bed looks! But, I'm going to hot glue the covered sponge over this, so it's o.k.
if it's a bit messy! Center, I have hot glued the matching felt to the bottom of each pet bed and this covers up the tape
used to wrap the bottom edges with fabric. Then I glued four beads on the bottom to act as 'legs' for the pet beds.
Right, my finished projects. I used a needle and thread to sew the seams down as well.

The doll's dog sleeps in the blue and green bedroom so we've selected a coordinating calico print to trim out his bed.
The dog is made from chenille stems. You can learn how to make one similar to mine by visiting Art Education Daily.

Craft a Unique Doll's Table Using Only Four Tiles!

       I am crafting some furnishings for Barbie and Ken's doll house. The dining room will tastefully decorated in neutral greys with just a pop of bright color. Below is the tile table craft which was so easy to make. However, it is important to collect just the right supplies in order to make a table like this one. You will need the help of an adult when cutting into styrofoam core with a sharp blade and when mixing grout. Read all of the directions carefully when working with the supplies. Make sure mom or dad are helping you while putting this table together!

Above you can see that this unique mosaic table is the perfect size for our 12 inch dolls by Mattel.
Supply List:
  • four printed tiles 
  • hot glue and hot glue gun
  • Styrofoam core for table base
  • self adhesive grey grout
  • candle holder (metal with intricate cut pattern)
  • acrylic sealer
  • black acrylic paint
  • Exacto knife (Sharp objects such as these need to be used by an adult.)
  • paper mache pulp
Step-by-Step Directions:
  1. You will need to purchase four square tiles of equal size for this project. I purchased the tiles you see here from a family dollar store.
  2. Measure the sizes of the tiles and add a 1/4 inch space between these tiles to configure the size of table's base you will need to cut for the project. I chose to make a table suitable for a 12 inch doll.
  3. Mix the grout and spread it in an even thin coat onto the table's base.
  4. Position your four tiles on top of this layer of grout and let everything dry thoroughly.
  5. Clean the tiles surfaces gently with a damp, clean sponge.
  6. Remove the handle and candle from the metal stand.
  7. Turn the tile 'table' top over and draw around the metal frame's circumference on the backside of the foam core with a pencil.
  8. Cut a groove where the circle has been traced and fit the metal candle stand inside this groove.
  9. Flood the circular cut where the stand fits with hot glue.
  10. Now fit the candle stand back into the groove firmly and let it dry completely.
  11. Mix a small amount of paper mache pulp. Carefully spread some of this between any cracks left in the foam core around the candle stand on the underside of the table. Let this dry for a few days.
  12. Paint the underside of the table and it's edges with black acrylic paint.
  13. Spray an acrylic sealer onto both the top and bottom of the table. It is unnecessary to spray the metal stand.
Left, here are the items that I have purchased from both a Dollar store and Resale. These metal
 candle holders are relatively common place in the U. S. Remove the candle and handle from
 the stand so that the container may be used to act as a base or 'legs' of a doll's table. Center,
you can see that I have attached the candle stand to the base of my table by cutting a groove
and filling it with hot glue and then paper mache. Right, I finished this table with black
acrylic paint.

Saturday, July 28, 2018

DIY a Gas Stove Top and Oven for Barbie's Family

       My kitchen stove top and oven at home is gas, so I chose to craft a similar model for Barbie's family and friends. The example below is just the right size for 12 inch fashion dolls; I have listed the exact measurements just in case you can not find a box with similar dimensions.
Imani and Rachel love this gas range and oven. What fun they will have baking and cooking for all the other doll
family members! Imani thinks this oven has plenty of space to bake a large turkey for Thanksgiving.
Supply List:
  • aluminum tape
  • black acrylic paint
  • a variety of buttons for oven temperature dials
  • black rectangle bead for digital temp. display
  • wooden tooth picks
  • Velcro tabs (black if possible, or dots)
  • recycled plastic sheet for oven window 
  • hot glue gun
  • small cardboard box the shape and size of an oven with cook top for Barbie and Ken dolls
  • black construction paper
  • wooden dowel and ball point pen cap for drawer pulls
  • silver paint (spray or acrylic)
  • masking tape
Step-by-Step Directions:
  1. Collect a box or cut one that measures approximately 5"long, 7"tall, 3 1/2" wide.
  2. Cut a door separately, 5"long, 4"tall.
  3. Cut a window opening, 2 1/2'' long, 1 1/2'' tall.
  4. Cut a piece of clear plastic slightly large and tape to the backside of the door with silver aluminum tape.
  5. Cover the rest of the door with the same silver tape both inside and out.
  6. Cover over all of the surfaces of the outside of the oven with silver aluminum tape.
  7. Mask the interior of the oven with plain masking tape completely.
  8. Paint the interior with black acrylic paint and let it dry.
  9. Using the aluminum silver tape, tape the lower end of the oven door at the bottom only to cover the opening to the oven. The tape should extend to the inside of the oven from the door.
  10. The Velcro tabs (or dots) should be positioned at both the top left and right corners of the oven door and also to a cardboard piece running across the interior top of the oven opening. The tabs should meet at both ends so that the door will remain shut when it is shut. (see placement below)
  11. Now you are ready to add any details that you would like.
  12. I cut my square gas burners from black paper and hot glued four tiny black buttons to the center of each burner where the gas flame would be on a real stove top.
  13. Then I hot glued black painted toothpicks down the center of the stove top to mimic a grill.
  14. You can hot glue buttons across the front of the oven, just above the oven door to act as burner dials and glue a black square bead to act as a digital clock and temperature gauge for the oven.
  15. I also cut a cardboard shelf for the inside of my oven. It measures slightly under 3"x5"to fit the interior. 
  16. I used white school glue to add toothpicks. Let these dry and then spray painted my shelf with silver paint. 
  17. I had to glue in extra cardboard pieces to hold the shelf up. Don't forget to paint these extra cardboard attachments with black acrylic paint.
  18. Wrap a wooden dowel the approximate length of the oven door with silver tape and hot glue it where you think the oven handle should be located.
  19. Remove the silver clasp from an old dried out, ball point pen and hot glue this to the drawer panel below just beneath the oven door. I chose to ad this detail for looks only. The drawer doesn't actually open.
Left, Collect a box or cut one that measures approximately 5"long, 7"tall, 3 1/2" wide.
Center, Velcro placement, Button placement, Door attachment.
Right,  I used white school glue to add toothpicks. Let these dry and then spray painted my shelf with silver paint.
Left, I cut my square gas burners from black paper and hot glued four tiny black buttons to the center of each burner
where the gas flame would be on a real stove top. Center, You can hot glue buttons across the front of the oven,
just above the oven door to act as burner dials and glue a black square bead to act as a digital clock and temperature
 gauge for the oven. Right, I also cut a cardboard shelf for the inside of my oven. It measures slightly under 3"x5"to fit
 the interior.

DIY a Washer and Dryer for Barbie

Imani can't wait to get this bright yellow, front loading
washer and dryer set home! Each have digital panel
features and tiny dials made from buttons!
       Barbie's laundry room at our blog home is growing daily, so as you may well guess, the doll's are eager to use this newly crafted, washer and dryer set. 
       You can make a set just like ours but you will need to wait for mom and dad to bake quite a few pancakes, cakes and pies in order to recycle  containers like ours! Perhaps you can convince them to save the cornstarch in a different plastic container?

Supply List:
  • two identical Argo Corn Starch containers
  • cardboard
  • masking tape
  • aluminum tape (or grey duck tape)
  • two identical tin lids from frozen juice cans
  • an assortment of buttons
  • hot glue gun and hot glue
  • pictures of water and tumbling cloths from a magazine
  • Mod Podge 
  • white school glue
Step-by-Step Directions: 
  1. Wash out the contents of each plastic recycled corn starch container.
  2. Soak the outside of the containers in warm water and dish detergent to remove the labels.
  3. Dry these off thoroughly.
  4. Screw the lids back on or save these for another project like I did, and cut a round piece of cardboard the same size as the opening to tape across and seal.
  5. Now use the masking tape to cover the entire area where the lids screw on the containers. 
  6. You can cover this area with aluminum tape if you'd like. 
  7. Turn the containers upside down so that these tops become the foot parts of the washer and dryer.
  8. Hot glue the tin lids from the frozen juice containers onto the front of both yellow boxes to mimic the doors of your front loaders.
  9. You can cut out water and clothing pictures from a magazine to fit inside the window parts of your round doors.
  10. Glue these to the interior of the round tins and Mod Podge over them.
  11. Now shape the cardboard panels with glue and tape to fit onto the top edges of each yellow machine. Then hot glue them in place.
  12. Search through your buttons to configure dials/controls to hot glue in place on top of the silver panels. 
Far left, I saved these two corn starch boxes because of their shape and bright color for this project.
Middle, you can see that I was thinking here whether or not to make them top loading or front loading.
Right, I shaped two top panels for the controls, dials and buttons from cardboard and masking tape.
Then, I hot glued these to the top edges of each appliance.
Make Your Own Washer and Dryer for Your Dolls:

Friday, July 27, 2018

Toothpaste Not Just for Whitening Teeth!

These dolls not only look clean, but they smell clean too, just like fresh mint!

        Try cleaning your dolls the way you clean your teeth! After purchasing these cabbage patch kids at a local resale shop in my area, I decided to give them a good brushing. These little figurines were so dirty and dingy, I thought that using a toothbrush would be just right for getting into those hard to reach areas. Then I used a dish washing soap for their yarn hair. I think that this experimental cleaning was quite successful don't you? Now my dolls look almost as clean as they were when first purchased!

What a dirty little doll; I hope that she can be restored!

Craft Lawn Care Tools for A Doll's House/Garage

Above left, You can see how I have shaped ordinary plastic forks and spoons into shovels
and a leaf rake using tape and paper mache pulp. Above right, a Barbie or Ken doll would
 be the appropriate size for the use of tools like these.
       The lawn care tools that I have made here are for a twelve inch doll. Later, I will include a craft about the making of a storage shed or tool shed to keep your doll's tools stored away. Until then, you can put them in a doll garage.

Supply List:
  • plastic forks and spoons
  • masking tape
  • white school glue
  • aluminum foil tape
  • paper mache pulp
  • sturdy scissors
  • acrylic paints: green and black
  • scrap corrugated cardboard
  • clear acrylic sealer or Mod Podge
Step-by-Step Directions:
  1. For the snow shovel, cut the handle from a plastic spoon, but leave enough of the spoon's lip to sandwich it between a corrugated cardboard cut out of a shovel shape along with a few drops of glue. 
  2. Then tape this attachment firmly in place and let it dry.
  3. Mask the lower snow shovel with aluminum tape and the upper handle with masking tape.
  4. Now paint and seal the handle with green acrylic paint and clear acrylic sealer. 
  5. The garden shovel is made from a plastic spoon and a bit of paper mache pulp. 
  6. Cover the entire plastic spoon with masking tape.
  7. Mix and shape the paper pulp around the spoon head to mimic a real garden shovel. You may find that looking at a real garden shovel improves this process.
  8. Let the shovel dry until it is hard before finishing the project. This may take a day or two of leaving the spoon in the sunshine.
  9. Cover this handle with aluminum tape and paint the hardened spoon head shovel black.
  10. Seal the garden shovel with clear acrylic or Mod Podge.
  11. For the leaf rake, you will need to cut the handles from the tines of two plastic forks.
  12. Tape firmly together the remaining eight tines to only one of the fork handles.
  13. Mask the entire surface of your leaf rake down to the fork tines only.
  14. Cover the tines of the rake with aluminum tape only.
  15. Layer and smooth enough paper pulp over the root extension of the fork pieces to create a rake like looking tool.
  16. Let the pulp harden in the sun for a few days and paint it green before spraying the entire surface with clear acrylic.

How to Make Trash Cans for A Doll's Garage

Trash cans in the United States have decorative lids similar to the ones pictured
above. I also found an additional grey, plastic container that also looks very
much like a trash can to go inside my doll's garage. You can find all kinds
of containers to clean and recycle that will look like miniature versions of
things you find around the house in real life. 
       I crafted these realistic looking trash cans for a twelve inch doll's garage. (Barbie and Ken dolls) However, you can use larger or smaller recycled tin cans for larger or smaller dolls if you prefer. A tiny tomato paste can will suit a six inch doll's home and a larger 20 oz. recycled can will fit an American Girl's Doll house.

Supply List:
  • 15 oz. tin cans
  • foil tape or silver packing tape (Get this in a hardware store.)
  • can opener (kitchen appliance)
  • plastic juice bottles
  • sturdy scissors
  • masking tape
  • cardboard
  • plastic trash bags: white and black
  • cotton batting
  • box cutter or razor blade (Only adults may use this!)
Step-by-Step Directions:
  1. Gather your supplies and remember that you must ask an adult to help you cut the garage can lid from the juice bottle's bottom with the box cutter before beginning.
  2. Also ask an adult or older sibling to cut and clean the can of food before beginning as this may have a sharp edge. He or she may need to flatten that inside edge with the backside of a spoon before smoothing a large sticky piece of silver packing tape over it. Some can openers do not leave sharp edges and you will not need to worry about including this step if you own one like this.
  3. Cut a narrow strip of cardboard to wrap and tape the edge of your trash can lip. While you are shaping this, continue to fit the lid over the tin can to make sure that it will fit once it is wrapped with aluminum tape.
  4. Cover the entire trash can lid with aluminum tape to form the decorative lid.
  5. Now line the interior of the trash can with a clean, trash bag cut down to fit the doll sized trash can.
  6. Stuff your doll's trash bag with clean cotton and twist tie the ends shut.
  7. Keep the trash cans inside your doll's garage and set them out curbside on the days that the imaginary trash collectors come by your doll's home.
      Above on the left you can see the empty, clean bottle of lemonade that I used to cut away a trash can lid for my project. The heavy, plastic molded pattern is on the bottom of this empty bottle and you will need to ask an older person to help you cut this out. On the right, is the bottom cut out and the cleaned tin can. I pressed a spoon around the inside lip of the can to smooth down any rough, sharp edges. Then I applied a very sticky aluminum tape to that cut area so that no child would be cut by the sharp edge.
      Above, you can see how the decorative stamped lid will fit onto the can. I also taped and glued a lip made from cardboard to the outside edge of the plastic lid before covering the entire lid's surface with very sticky aluminum tape.
     Left, I taped a cut piece of clean, black trash bag to the inside of my tin can. Then I filled the trash bag with clean cotton and twist tied the opening shut. Right, you can also turn the trash bag's edge over the top of the can like so if you want to create the illusion of the "can in use" for a doll display.

More Ideas for A Doll's Garage:

Wednesday, July 4, 2018

The Transforming Wand

       The play of young fancy meets us in the very domain of the senses: it is active, often bewilderingly active, when the small person seems busily engaged in looking at things and moving among them.
       We see this fanciful "reading" of things when a child calls the star an "eye," I suppose because of its brightness and its twinkling movement, or says that a dripping plant is "crying ".
        This transforming touch of the magic wand of young fancy has something of crude nature-poetry in it, This is abundantly illustrated in what may be called childish metaphors, by which they try to describe what is new and strange. For example, a little boy of nineteen months looking at his mother's spectacles said: "Little windows". Another boy two years and five months, on looking at the hammers of a piano which his mother was playing, called out: "There is owlegie" (diminutive of owl). His eye had instantly caught the similarity between the round felt disc of the hammer divided by a piece of wood, and the owl's face divided by its beak. In like manner another little boy called a small oscillating compass-needle a "bird" probably on the ground of its fluttering movement. Pretty conceits are often resorted to in this effort to get at home with strange objects, as when stars were described by one child as "cinders from God's stove," and butterflies as " pansies flying".
       This play of imagination upon the world of sense has a strong vitalizing or personifying element. A child is apt to attribute life and sensation to what we serious people regard as lifeless. Thus he gives not only a body but a soul to the wind when it whistles or howls at night The most unpromising things come in for this warning, life-giving touch of a child's fancy. Thus one little fellow, aged one year eight months, conceived a special fondness for the letter W, addressing it thus: "Dear old boy W ". Miss Ingelow tells us that when a child she used to feel sorry for the pebbles in the causeway for having to lie always in one place, and would carry them to another place for a change.
       It is hard for us elders to get back to this childish way of looking at things. One may however hazard the guess that there is in it a measure of dreamy illusion. This means that only a part of what is present is seen, the part which makes the new object like the old and familiar one. And so it gets transformed into a semblance of the old one; just as a rock gets transformed for our older eyes into the semblance of a human face.
       There is another way in which children's fancy may transmute the objects of sense. Mr. Ruskin tells us that when young he got to connect or "associate" the name "crocodile " so closely with the creature that when he saw it printed it would take on something of the look of the beast's lanky body.
       How far, one wonders, does this process of transformation of external objects go in the case of imaginative children? It is not improbable that before the qualities of things and their connections one with another are sufficiently known for them to be interesting in themselves they often acquire interest through the interpretative touch of childish fancy.
       There is one new field of investigation which is illustrating in a curious way the wizard influence wielded by childish imagination over the things of sense. It is well known that a certain number of people habitually "color" the sounds they hear, imagining, for example, the sound of a particular vowel or musical tone to have its characteristic tint, which they are able to describe accurately. This "colored hearing," as it is called, is always traced back to the dimly recalled age of childhood. Children are now beginning to be tested as to their possession of this trick of fancy. It was found in the case of a number of school-children that nearly 40 percent, described the tones of certain instruments as colored. There was, however, no agreement among these children as to the particular tint belonging to a given sound: thus whereas one child mentally "saw" the tone of a fife as pale or bright, another saw it as dark.
       I have confined myself here to what I have called the play of imagination, the magical transmuting of things through the sheer liveliness of childish fancy. The degree of transmutation will of course vary with the intensity of the imagination. Sometimes when a child dwells on the fancy it may grow into a momentary illusion. A little girl of four, sitting by the side of her mother in the garden, picked up a small pink worm and said: "Ah I you do look nice; how a thrush would like you!" and thereupon, realizing the part of the fortunate thrush, proceeded, to her mother's horror, to eat up the worm quite composedly. The momentary illusion of something nice to eat, here produced by a lively realization of a part, may arise in other cases from strong feeling, more especially fear, which, as we shall see, has so large a dominion over the young mind.
       This witchcraft of the young fancy in veiling and transforming the actual surroundings is a good deal restrained by the practical needs of everyday life and by discussion with older and graver folk. There are, however, regions of child-life where it knows no check. One of these is child's play, to be spoken of presently: another is the filling up of the blank spaces in the visible world with the products of fancy. We will call these regions on which the young wing of fancy is wont to alight and rest, fancy's resting places.

Building  fancy's resting place by the kids next door.

Saturday, June 30, 2018

Sister Nell Goes to a Party Paper Doll

The Fashion-Doll Cut-Outs 
By Nandor Honti 
Above is a fashionable paper doll from 1925, two party dresses and a robin's egg blue cape.
       Cut out each piece, carefully following the outlines. Fold on dotted lines. Paste the matching numbers together beginning by pasting 1 to 1 and son on till all the numbers are used. Hold the pasted places together until the paste hardens enough to hold, so they will not slip apart.

Raggedy Ann And The Painter

Raggedy Ann And The Painter

       When housecleaning time came around, Mistress' mamma decided that she would have the nursery repainted and new paper put upon the walls. That was why all the dolls happened to be laid helter-skelter upon one of the high shelves.
       Mistress had been in to look at them and wished to put them to bed, but as the painters were coming again in the early morning, Mamma thought it best that their beds be piled in the closet.
       So the dolls' beds were piled into the closet, one on top of another and the dolls were placed upon the high shelf.
       When all was quiet that night, Raggedy Ann who was on the bottom of the pile of dolls spoke softly and asked the others if they would mind moving along the shelf.
       "The cotton in my body is getting mashed as flat as a pancake!" said Raggedy Ann. And although the tin soldier was piled so that his foot was pressed into Raggedy's face, she still wore her customary smile.
       So the dolls began moving off to one side until Raggedy Ann was free to sit up.
       "Ah, that's a great deal better!" she said, stretching her arms and legs to get the kinks out of them, and patting her dress into shape.
       "Well, I'll be glad when morning comes!" she said finally, "for I know Mistress will take us out in the yard and play with us under the trees."
Tossed in the air
       So the dolls sat and talked until daylight, when the painters came to work.
       One of the painters, a young fellow, seeing the dolls, reached up and took Raggedy Ann down from the shelf.
       "Look at this rag doll, Jim," he said to one of the other painters, "She's a daisy," and he took Raggedy Ann by the hands and danced with her while he whistled a lively tune. Raggedy Ann's heels hit the floor thumpity-thump and she enjoyed it immensely.
       The other dolls sat upon the shelf and looked straight before them, for it would never do to let grown-up men know that dolls were really alive.
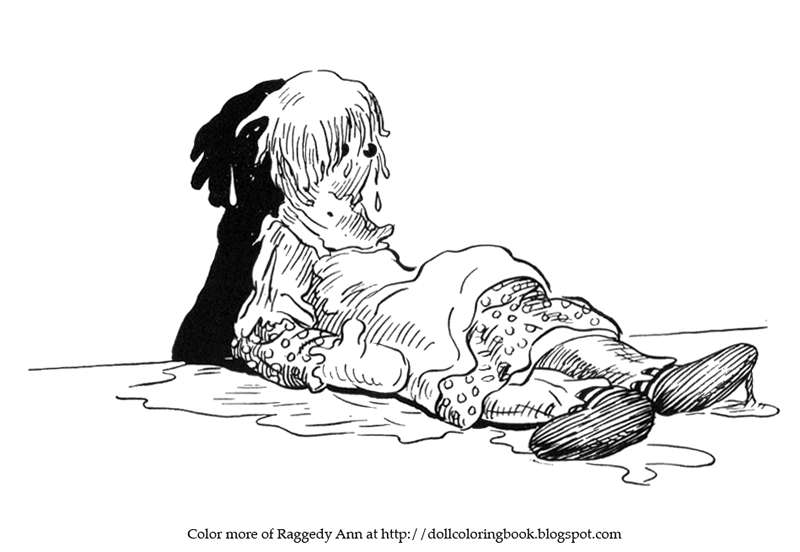
Color dear old Raggedy covered in paint.
       "Better put her back upon the shelf," said one of the other men. "You'll have the little girl after you! The chances are that she likes that old rag doll better than any of the others!"
       But the young painter twisted Raggedy Ann into funny attitudes and laughed and laughed as she looped about. Finally he got to tossing her up in the air and catching her. This was great fun for Raggedy and as she sailed up by the shelf the dolls all smiled at her, for it pleased them whenever Raggedy Ann was happy.
       But the young fellow threw Raggedy Ann up into the air once too often and when she came down he failed to catch her and she came down splash, head first into a bucket of oily paint.
       "I told you!" said the older painter, "and now you are in for it!"
       "My goodness! I didn't mean to do it!" said the young fellow, "What had I better do with her?"
       "Better put her back on the shelf!" replied the other.
       So Raggedy was placed back upon the shelf and the paint ran from her head and trickled down upon her dress.
       After breakfast, Mistress came into the nursery and saw Raggedy all covered with paint and she began crying.
       The young painter felt sorry and told her how it had happened.
       "If you will let me," he said, "I will take her home with me and will clean her up tonight and will bring her back day after tomorrow."
       So Raggedy was wrapped in a newspaper that evening and carried away.
       All the dolls felt sad that night without Raggedy Ann near them.
       "Poor Raggedy! I could have cried when I saw her all covered with paint!" said the French doll.
       "She didn't look like our dear old Raggedy Ann at all!" said the tin soldier, who wiped the tears from his eyes so that they would not run down on his arms and rust them.
       "The paint covered her lovely smile and nose and you could not see the laughter in her shoe-button eyes!" said the Indian doll.
       And so the dolls talked that night and the next. But in the daytime when the painters were there, they kept very quiet.
       The second day Raggedy was brought home and the dolls were all anxious for night to come so that they could see and talk with Raggedy Ann.
       At last the painters left and the house was quiet, for Mistress had been in and placed Raggedy on the shelf with the other dolls.
       "Tell us all about it, Raggedy dear!" the dolls cried.
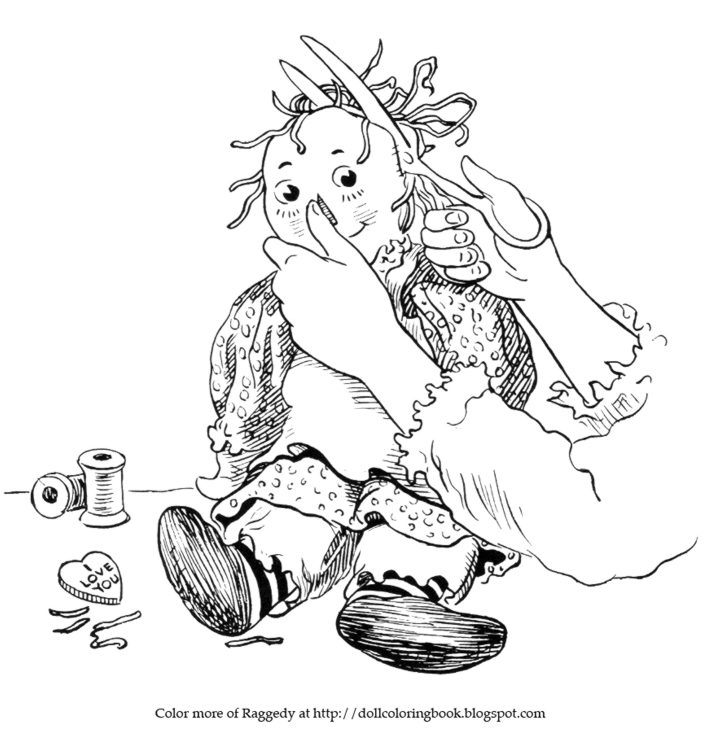
Color Raggedy as she gets new yarn hair.
       "Oh I am so glad I fell in the paint!" cried Raggedy, after she had hugged all the dolls, "For I have had the happiest time. The painter took me home and told his Mamma how I happened to be covered with paint and she was very sorry. She took a rag and wiped off my shoe-button eyes and then I saw that she was a very pretty, sweet-faced lady and she got some cleaner and wiped off most of the paint on my face.
Telling the story
       "But you know," Raggedy continued, "the paint had soaked through my rag head and had made the cotton inside all sticky and soggy and I could not think clearly. And my yarn hair was all matted with paint.
       "So the kind lady took off my yarn hair and cut the stitches out of my head, and took out all the painty cotton.
       "It was a great relief, although it felt queer at first and my thoughts seemed scattered.
On the line again
       "She left me in her work-basket that night and hung me out upon the clothes-line the next morning when she had washed the last of the paint off.
       "And while I hung out on the clothes-line, what do you think?"
       "We could never guess!" all the dolls cried.
       "Why a dear little Jenny Wren came and picked enough cotton out of me to make a cute little cuddly nest in the grape arbor!"
       "Wasn't that sweet!" cried all the dolls.
       "Yes indeed it was!" replied Raggedy Ann, "It made me very happy. Then when the lady took me in the house again she stuffed me with lovely nice new cotton, all the way from my knees up and sewed me up and put new yarn on my head for hair and - and - and it's a secret!" said Raggedy Ann.
       "Oh tell us the secret!" cried all the dolls, as they pressed closer to Raggedy. "Well, I know you will not tell anyone who would not be glad to know about it, so I will tell you the secret and why I am wearing my smile a trifle broader!" said Raggedy Ann.
       The dolls all said that Raggedy Ann's smile was indeed a quarter of an inch wider on each side.
       "When the dear lady put the new white cotton in my body," said Raggedy Ann "she went to the cupboard and came back with a paper bag. And she took from the bag ten or fifteen little candy hearts with mottos on them and she hunted through the candy hearts until she found a beautiful red one which she sewed up in me with the cotton! So that is the secret, and that is why I am so happy! Feel here," said Raggedy Ann. All the dolls could feel Raggedy Ann's beautiful new candy heart and they were very happy for her.
       After all had hugged each other good night and had cuddled up for the night, the tin soldier asked, "Did you have a chance to see what the motto on your new candy heart was, Raggedy Ann?"
       "Oh yes," replied Raggedy Ann, "I was so happy I forgot to tell you. It had printed upon it in nice blue letters, 'I LOVE YOU.'"
Color Raggedy as she reassures her friends that she is alright.