Description of Coloring Page: fur trimmed fur coat, china doll dressed for cold winter snow, large brass buttons, giant hat with flowers
Don't forget to drag the png. or jpg into a Word Document and enlarge the image
as much as possible before printing it folks. If you have a question
about this coloring page, just type into the comment box located
directly below this post and I'll try to get back to you as soon as I
can.
Description of Coloring Page: tiny flowers, forget-me-nots, coat for Spring, curly wig, old-fashioned clothes, toddler doll body, Toddler Dolls, porcelain or china dolls
Don't forget to drag the png. or jpg into a Word Document and enlarge the image
as much as possible before printing it folks. If you have a question
about this coloring page, just type into the comment box located
directly below this post and I'll try to get back to you as soon as I
can.
Raggedy holds the author's pencil and waits patiently for
her stories to begin. Black and white versions are
produced for coloring by kathy grimm.
Raggedy Ann & Andy Stories Written & Illustrated by Johnny Gruelle Some stories slightly edited by Kathy Grimm
Preface and Dedication
As I write this, I have before me on my desk, propped up against the telephone, an old rag doll. Dear old Raggedy Ann!
The same Raggedy Ann with which my mother played when a child.
There she sits, a trifle loppy and loose-jointed, looking me squarely in the face in a straightforward, honest manner, a twinkle where her shoe-button eyes reflect the electric light.
Evidently Raggedy has been to a "tea party" today, for her face is covered with chocolate.
She smiles happily and continuously.
True, she has been nibbled by mice, who have made nests out of the soft cotton with which she has been stuffed, but Raggedy smiled just as broadly when the mice nibbled at her, for her smile is painted on.
What adventures you must have had, Raggedy!
What joy and happiness you have brought into this world!
And no matter what treatment you have received, how patient you have been!
What lessons of kindness and fortitude you might teach could you but talk; you with your wisdom of fifty-nine years. No wonder Rag Dolls are the best beloved! You are so kindly, so patient, so lovable.
The more you become torn, tattered and loose-jointed, Rag Dolls, the more you are loved by children.
Who knows but that Fairyland is filled with old, lovable Rag Dolls - soft, loppy Rag Dolls who ride through all the wonders of Fairyland in the crook of dimpled arms, snuggling close to childish breasts within which beat hearts filled with eternal sunshine.
So, to the millions of children and grown-ups who have loved a Rag Doll, I dedicate these stories of Raggedy Ann. by Johnny Gruelle.
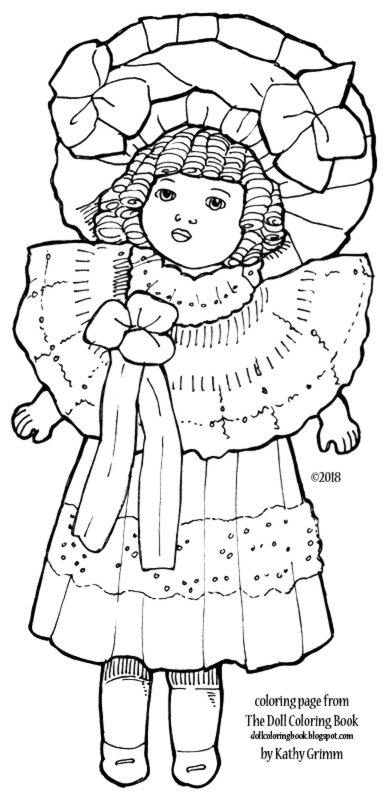
Description of Coloring Page: large ribbons, floppy large hat, large collar, lace, curly wig, tiny hands and feet, Toddler Dolls, Porcelain or China dolls
Don't forget to drag the png. or jpg into a Word Document and enlarge the image
as much as possible before printing it folks. If you have a question
about this coloring page, just type into the comment box located
directly below this post and I'll try to get back to you as soon as I
can.
Description of Coloring Page: sewing stitches, black nose, quilted and stuffed teddy bear, teddy smile, patchwork
Don't forget to drag the png. or jpg into a Word Document and enlarge the image
as much as possible before printing it folks. If you have a question
about this coloring page, just type into the comment box located
directly below this post and I'll try to get back to you as soon as I
can.
I paid only ten cents for these little, child sized potholders in an estate sale. Each revealed bright colors after giving them a good scrub. Then, I decided they needed a bit of decoration. So I cut a flower, cherries and strawberry from a bit of felt and appliqued the designs with hand-stitching. With just a few finishing touches (pom poms and seed beads) this project was finished in under an hour.
Left, Vintage print fabric potholders in bold colors: blue, green, yellow and red will look sweet with our kitchen oven in the playroom. Right, an old-fashioned woven potholder made with loops came with the set. It is color coordinated with the quilted potholders.
I cut simple shapes of both a strawberry and cherries for my appliques. Then I cut brown stems and green leaves from felt. After sewing the designs directly onto the tops of my potholders, (using a blanket stitch ) I then attached a few black seed beads to my strawberry to mimic real seeds.
I printed a 1930s flower design from my Christmas blog and cut it out to use for the applique seen above. I used a finer thread to attach the pom poms and seed beads to the center of my design. You obviously don't need to worry about
plastic or furry trims when decorating pretend potholders!
Description of Coloring Page: ribbon skirt on a Slovakian rag doll, apron, shawl, head covering, rick-rack, stuffed doll, folk art fashions, folk art doll
Don't forget to drag the png. or jpg into a Word Document and enlarge the image
as much as possible before printing it folks. If you have a question
about this coloring page, just type into the comment box located
directly below this post and I'll try to get back to you as soon as I
can.
Description of Coloring Page: teddy bear, sleepy teddy bear, night cap, night shirt, dressed for bed, velvet nose, droopy eyelids, felt eye lashes, fuzzy ears
Don't forget to drag the png. or jpg into a Word Document and enlarge the image
as much as possible before printing it folks. If you have a question
about this coloring page, just type into the comment box located
directly below this post and I'll try to get back to you as soon as I
can.
My two fresh baked pies were hardened in the summer sun
and look good enough to eat!
Make a couple of delicious looking pretend pies to serve at a doll dinner party. I decided to shape a lattice top cherry pie and a simple blueberry pie from papier-mâché pulp for our playroom kitchen but you could make any pie you prefer from this old, familiar, classroom art supply.
Supply List:
round box with both the top and bottom
papier-mâché pulp (small pack)
masking tape
brown paper bags
white school glue
Mod Podge or clear acrylic sealer
acrylic paints: reds, browns, purple
paint brush (stencil brush is optional)
newsprint
Step-by-Step Instructions:
You will need a small round box container for this project. Something tossed our from the grocery store will be fine. I kept a brie cheese container for my pies. The container should be clean and dry, with no food residue.
Open the box and keep both sides face up. Crumple some newsprint and add this to the openings. The newsprint when wadded will create an uneven surface which is good. The more berries you have in a pie, the more uneven the surface will look. This newsprint will act as the filling for our two pies and will support the papier-mâché pulp tops as we sculpt.
Cover or mask both open faced "pie" shapes entirely with making tape. Sealing off the top of the pie shells with the crumpled newsprint inside.
Shred the flimsy, paper bag paper into random shapes to apply with glue onto the both halves of our pretend pies. This step strengthens the sculpted forms.
After covering the surfaces of the filled pie shapes thoroughly with the brown paper bag layer, apply a layer of Mod Podge. Let dry.
Now mix the papier-mâché pulp according to the directions. Start the process by adding only a little bit of water at a time, gradually working the pulp into a slightly stiff clay. Do not add all of your pulp into a bowl at once and mix. It only takes a handful of pulp to sculpt each pie top. If you need more, you can mix it as you go. The pulp may be layered and it will adhere to it's own surface.
Now you may shape this pulp on top of the bumpy pie surfaces only. Don't worry about whether or not the surface is applied evenly. Papier-mâché pulp is a very forgiving material and pies are lumpy on top anyway. So just sort-of apply approximately 1/2 inch of the sticky stuff to the entire surface of each pie.
If you are a beginner, you will start by shaping the blueberry pie shown on my posting here. It has a simple, uniform surface with only a few finger holes on the top to reveal its purple juices after painting.
Shaping the cherry pie with a lattice top may prove to be a bit challenging for beginners. I did not make it with strips of pulp! I shaped the lattice work and pulp balls directly onto the top. Applying more white glue to ensure that the fake cherries stayed in place during the drying time. If you should take up this challenge, do not worry if you need to reattach cherry shapes a second time after letting this pie sculpture dry. (See photos below)
Shape the edges of your pies just as you normally would when sealing the edges of a real pie. You can do this with your finger tips or a plastic fork if you like. ( How to make decorative pie crust. )
Now set these papier-mâché pulp pies in the hot sun for baking... The hotter and sunnier outdoors or on a window seal, the better! It may take a few days for the pulp pies to harden up.
Paint the tops of your pies using quick drying acrylic paints. Mix up several variations of browns so that you can apply these randomly as you work. A stencil brush may help the process for those of you who have never painted a surface like this before.
It helps to observe a real blueberry or cherry pie while painting your own. Prepare to get hungry!
After painting the pies let them dry thoroughly in the sunshine.
Apply the acrylic sealer to the tops of your finished pie masterpieces. Let these dry again before serving them up to your doll companions.
Left, You will need a small round box container for this project. Center, The newsprint when wadded will create an uneven surface which is good. Right, Cover or mask both open faced "pie" shapes entirely with making tape.
Shaping the cherry pie with a lattice top may prove to be a bit challenging for beginners.
I used Mod Podge to seal the lower half of each pie.
Brown paper bags were used to craft the pie crusts on bottom.
What the papier-mâché pies look like after drying in the hot sun.
The ruffled, canvas canopy cover may be either sewn
together or assembled with a hot glue gun.
Cover the top of your market stall with an attractive gathered canopy.
This fun fabric, printed with large veggies, was purchased from IKEA.
I purchased a child's play market stall for the nursery downstairs several years ago. I am now just getting around to setting it up properly. This stall comes with brace work designed to support a fabric canopy. I can't seem to find a picture of it on the internet, so I will need to craft one based upon my own measurements and design.
It is not difficult to construct canopy covers; any adult or older child can take a few measurements and sew a few straight seams to accomplish this project. In fact, you do not need to sew any part of the canopy. If you prefer to use a glue gun, this will suffice as well. I chose to sew my own because I want to switch it out with alternative canopy trims and store it. Sewing something properly always makes the handling of it more practical.
Supply List:
one yard of heavy canvas fabric
scissors
large needle
thick thread
cardboard
glue gun (optional)
Measure across the top of the canopy, both the length and the width. Cut a piece of heavy cardboard to fit the top of the canopy brace work exactly. Cut both top and bottom pieces of your canvas fabric to cover this long narrow piece of cardboard. You can either sew or hot glue this canvas to the cardboard. Trim and tuck under all the edges so that this piece looks clean and professional. My canopy top measured 23 1/2 inches by 5 1/2 inches.
Now you will need to make the ruffle to attach to the covered fabric cardboard. This may be sewn or attached with hot glue after it has been cut, hemmed and gathered. Measure from the top of your canopy brace downward when determining how long you would prefer your canopy's ruffle to drape. I chose to make a ruffle twelve inches from top to bottom and approximately six feet long. (The included seam allowance)
The length of the fabric must be gathered in order to make the ruffle. You don't need much extra fabric in order to sew a neat ruffle. The circumference around my canopy top at it's widest point measured 67 inches. This is because the braces were built with angles extending out from the sides of the canopy.
The original fabric awning (if there was one) probably looked something like a trapezoid shape. However I chose to sew a ruffled, fabric canopy to compensate for this shape. By adding an additional six inches of fabric to the length of my ruffle I was able to ensure the fabric would cover the widest part of this brace work neatly.
Six inches may not sound like much, but it is plenty of ruffle when using a canvas fabric. Canvas is heavier than cotton and it must be used sparingly in order to make it lay neatly around the edges of a piece of furniture.
Now if you wanted to cover the canopy with a light weight cotton, you could add more than six inches to your ruffle and it would look nice. However, I would not extend the length of a cotton version ruffle more than twelve inches in addition to the exact circumference of my stall's braces.
How to use heat-n-bond ultrahold tape for
finishing fabric edges without sewing.
Before attaching the ruffle to the edge of your covered canopy top, you will need to sew a hem around both the top and bottom of the ruffle. You may use a kind of sewing tape that may be applied with a hot iron if you should choose to avoid any sewing here. I simple ran my fabric through the sewing machine and then ironed the hems flat before gathering the edges with a wide straight stitch across the top edge of my ruffle. Make sure to knot one end of that strong thread so that you can pull the end piece of it to create a gathered ruffle.
Now pin the ruffle into place around the edge of your canopy cardboard. Spread this evenly with slightly more ruffle around each end of the canopy where the braces form the extended top. It is easiest to sew this or hot glue this into place while working directly onto the wooden, canopy brackets. Be careful not to attach the ruffle directly to the braces, only attach the ruffle to the cardboard top! This is not a problem if you are sewing, but glue may cause a bit of trouble if your not careful about how liberally you apply it. Press the fabric canopy using spray starch. Trim off any stray threads.
My pretend preserves are cooling on the window seal. Soon someone small will have a charming,
new addition to her old-fashioned, play pantry.
Any older brother or sister can craft these adorable, homemade jelly or jam jars for a child sized market stall or play kitchen! It's a simple craft that looks like just like real preserves! You can choose to draw pictures of fruit fillings, apply stickers or Mod Podge free, fruit clip art from the web onto the labels I have provided below. The age of your crafter will predetermine whichever steps you decide to take when decorating these labels.
Draw a larger circle using a pencil, onto
the wrong side of your fabric selections.
Cut an additional 1/2 inch margin around
the circle for a proper ruffle if making a
template from the jelly jar itself.
Supply List:
four glass or plastic containers
four acrylic paint colors: blue, purple, red and orange
labels for jellies and jams
stickers of fruit (optional)
Mod Podge
soft paint brush
scissors
pencils, crayons or paint for coloring fruit
calico or gingham cotton fabric (scraps)
rubber bands
Step-by-Step Directions:
Gather your supplies before beginning. You do not need to use glass jars like mine, if you are afraid they might break when handled by little ones roughly. There are many grocery products on the market that come in similar styles and sizes to mine that are made from plastic. I used four glass yogurt jars that look just like old-fashioned jelly jars for this craft.
Clean the jars with warm soap and water; removing any labels from the outside of the jar with a bit of elbow grease, of course.
Squeeze a small amount of paint into each jar and cover the entire surface of the inside of the jars with color. Rotate the jars from side to side until there is a nice even coat of paint. Drain the excess of paint back into the paint containers if possible. Let the paint in each jar harden over night before proceeding to the following steps.
Using a round template/pattern (from a glass or plate or the jar plus 1/2 inch), draw a larger circle using a pencil, onto the wrong side of your fabric selections. Repeat this four times for each jar of jam. Make sure that the circles are larger than the top openings of your pretend jam/jelly jars by at least one half inch. You will need this much fabric to hang over the outer rims all the way around each jar in order to seal them with a rubber band.Mothers and Grandmothers often decorate their home made preserves with similar fabric rounds after canning themselves.
Set these fabric lid covers aside for wrapping the tops of each jar later.
Now print out the labels that I have included for the project below.
You can choose to draw and then color in four separate fruits for each label: grapes, apricots, strawberries, and blue berries. Alternatively, you could use some colorful, fruity stickers to decorate each label before applying them with Mod Podge instead of drawing and coloring the fruits if you wish.
Use the blue berry label for a jar painted with blue acrylic, a strawberry label for a red painted jar, an apricot label for an orange painted jar and finally a purple painted jar for the grape jelly label.
After coloring in or decoupaging each label with stickers, apply Mod Podge to the surface areas of each jar of jam and carefully stick the labels onto the painted jars. Let the surface dry and repeat an application of Mod Podge on top of the labels to protect them from play.
Now secure a fabric round to the top of each jar with a rubber band. (see photo)
Left, Clean the jars with warm soap and water. Right, Let the paint in each jar harden over night before proceeding.
Here I have drawn some free labels for your jam & jelly jars.
I added yellow, calico, fabric lids to my pretend preserves.
Left is the Dutch copper coalscuttle or coal bucket purchased for fifty cents. I've given it a good cleaning (Right) so that little ones may use it for dramatic play in our family's old-fashioned play kitchen. Children can learn much about social history when parents and educators include items such as this one in their play areas.
A coal scuttle, sometimes spelled coalscuttle and also called a hod, "coal bucket", or "coal pail", is a bucket-like container for holding a small, intermediate supply of coal convenient to an indoor coal-fired stove or heater.
Coal scuttles are usually made of metal and shaped as a vertical cylinder or truncated cone, with the open top slanted for pouring coal on a fire. It may have one or two handles. Homes that don't use coal sometimes use a coal scuttle decoratively. I purchase this Dutch copper, coalscuttle at a flee market. It was filthy! However, I cleaned it up with a home recipe and it now is used as a decorative/toy item in the downstairs playroom of my home.
Supply List:
table salt
large deep plastic bucket (don't use a nice one)
giant jug of white distilled vinegar
paper towels or soft rag
scrub brush (not for use in combination with foods)
Step-by-Step Directions:
First, clean off the dirt and grime on the coalscuttle that may be removed with soap and water.
Choose a large, plastic bucket that will easily hold fluids and the coalscuttle. You want the the bucket to hold a fairly large amount of vinegar. I chose a very deep bucket to clean my copper coal bucket in.
You can lay the bucket on it's side and rotate it in the solution to get an even soak all around both the inside and outside parts of your coalscuttle, as it soaks.
Add approximately 1/4 cup of table salt to a gallon of white distilled vinegar.
Let the dirty copper/brass scuttle soak for several hours. Turn the scuttle from side to side periodically.
You will see immediate results, however be prepared to soak the cooper item(s) in the solution for several hours in order to get the desired level of cleaning.
Pour the solution out onto a driveway, gravel bed etc... onto unwanted weeds. This will not only kill unwanted plant growth but protect your grass or ground water sources from the vinegar solution after you have used it.
Wash the coalscuttle with warm soapy water again and rub it down with a dray, soft rag. Throw the rag away.
Ads from old newspapers depicting and describing the use of a coalscuttle.
The hot labor making coal kitchen versus the sanitary
all gas kitchen from 1913.
Is Your Cooking a Fireman's Job? advertisement
The advertisement above reads, "Are you handling coal and ashes; keeping the kitchen range red-hot for baking, or covering the coals for stewing? Why not do away with the constant attention demanded by the coal stove--the irregular heat--the shifting of pots and kettle-- the smut and smoke-- woodpile and coal scuttle?" (Products advertised in photographs here no longer exist. The ads are used for teaching students about historical content only.)
Farm Life in The Rural Midwestern Farm.
Social History of Midwestern Families 100 Years Ago: