Tuesday, June 26, 2018

Make a pom-pom dollhouse rug

A finished pom pom rug for a doll's house.
       What doll wouldn't enjoy such a fun, bumpy rug to decorate her home with? 
       This little miniature doll house rug is a simple and entertaining first sewing project for a nine to ten year old student.
       He or she will need to learn how to thread a needle and control it while stringing together a whole fist full of colorful pom-poms.

Supply List:
  • multiple colored, small pom-poms
  • needle and thread
Step-by-Step Directions:
  1. First you will need to select a colorful thread and needle to work with. 
  2. Thread the needle and knot the end of your thread so that thread will get caught up inside your first pom-pom. This requires a bit of trail and error. Sometimes the threads will not catch properly as you string the pom-poms and you will need to repeat the process. 
  3. Soon you will have a long string of pom-poms to wind up together. 
  4. Work your threaded needle between the chain of pom-poms, from side to side so that these butt up next to each other to form a soft round rug.
  5. As you work, you may need to sew in a loose pom-pom here and there to make the rug stiffer.
  6. The more pom-poms you add, the bigger the miniature rug becomes! Measure it against a doll's chair, sofa, or even a bed in order to determine just how large you would like the rug to be.
  7. Work the threaded needle back and forth into the last pom-pom on the chain before trimming the needle off the thread.
These are miniature pom-poms that you can purchase from most any dollar store or hobby shop.


Older kids may like to try making a life-sized pom-pom 
rug for their room after successfully finishing the 
miniature project above.

Crush & Craft Pretend Potatoes

Our pretend potatoes for the market stall.
       Any child can craft pretend potatoes with very little effort! After your small one has mastered this easy craft, challenge him or her to sculpt something a bit more difficult. 
       Place fruits and veggies in on a table and have the him touch and explore the organic shapes and textures. Next ask him shape the aluminum foil into more advanced shapes such as carrots or turnips or maybe even a pumpkin. 
       Before you know it, you'll have plenty of veggies for an entire pretend veggie stand to play with!

Supply List:
  • aluminum foil
  • masking tape
  • brown paper bags
  • white school glue
  • Mod Podge optional
  • stapler
  • recycled netting from potato bag
Step-by-Step Directions:
  1. Tear off large 12"x12" squares of aluminum foil.
  2. Shape the foil into silver potatoes, you won't need to crush these down so much!
  3. Leave the bumpy parts of the potatoes alone, when these are covered with brown paper, they will look more realistic.
  4. Cover these shapes with masking tape.
  5. Now cover the shapes with white school glue and shredded, brown grocery bags.
  6. Let the pretend potatoes dry over night.
  7. Save the netted bag that comes with your real potatoes at the grocery bag.
  8. Fold, mask and staple some of the printed grocery bags to seal the pretend bag of potatoes inside of their very own netting. (photos of this process below)
Left, Shape foil into potatoes shapes. Middle, cover these with masking tape. Right,
Now cover the shapes with white school glue and shredded, brown grocery bags.
Cut, fold, tape, staple and trim the paper ends of your potato prop.
Cut the top handle of a brown grocery bag off, tape and staple the top end of the potato net into it as shown above.

To A Potato. 
by Mary Walpole Wood
Thou white and soft perfection of thy kind!
Thou feathery, powdery, dainty edible,
Thy snowy, creamy substance, gustable,
Delights the eye and satisfies the mind.
What though a lowly place 'tis thine to find -
Mere side-dish in the grand menu-yet still
Temptation must each fluffy crevice fill,
And be (the cook agreeing) pleasure-lined.

How fared the world before thy presence came?
How set a dinner for the genial group,
So wont around my eager board to troop,
Without thy laughing face and 'customed name?
Nay, bid me not to such resources stoop?
Too helpless I-too high and proud thy fame.

Monday, June 25, 2018

Crafting burlap coffee bean bags and purchasing a burr mill...

Pretend burlap bags are stuffed with cotton and used for play
in a children's market stall.
       Our family nursery has so many old-world props for grandchildren to play with while learning about Midwestern history and culture. Below are directions for making very simple burlap bags to contain pretend food stuffs like coffee, flour, potatoes and rice. And I have also purchased a coffee grinder at resale for $3.00 to teach the kids how coffee and flour were processed in small amounts prior to the invention of electric grinders.
       Burlap is processed from jute or hemp. Before the Civil War, my family farmed hemp in Missouri. Hemp is like the industrial version of jute. Hemp was sometimes used to make bags for storing and transferring all kinds of food product to market. It is most often used now to make rope and durable carpets. Jute, which is a similar plant, was used to make fabric for ticking (a utility fabric). Over time, paper bags, tin cans and foil bags replaced burlap in the shipping and storing of coffee to the general public, because these were much cheaper to manufacture.
       Although the early burlap bags were printed in mass manually with the use of a silk screen, our simple process will achieve a similar result with art supplies easily found in every American home.

The coffee grinder in our family nursery is new but it's design
dates back to those burr mills manufactured just after The
Civil War. It is one of many interesting kitchen tools that is
displayed in my old-fashioned, play kitchen.
 Supply List:
  • Off-white burlap fabric, 3/8 yard (Use scraps if you have them instead)
  • a black permanent Sharpie marker with a wide tip
  • dental floss
  • embroidery needle
  • heavy twine or a red yarn alternative
  • a plastic bag or tin foil
  • cotton batting
  • paper grocery bag with red printing (optional)
Step-by-Step Instructions:
  1. Cut the burlap to whatever size you would prefer for this easy sewing craft. Mine are approximately 12" x 6".
  2. Use a sheet of plastic or tin foil to protect whatever drawing surface you wish to work on top of. This is because the weave of burlap is very loose and the permanent ink marker may transfer to the surface beneath the burlap while you are lettering your design.
  3. I drew my letters with a soft number 2 pencil before tracing over these with a black, permanent ink marker.
  4. It's important to use a wide tip marker so that this tip will stand up to the rough surface of the burlap while you press into it.
  5. It is also important to work on top of a off-white colored burlap in order for your ink based lettering to show up well.
  6. I also added a few, small coffee bean graphics to my sample, burlap bag shown above. I also stapled a strip of paper trim to the rice bag version, just to add a bit of color to it.
  7. Sew around the circumference of of each bag several times with a machine straight stitch, leaving a big enough opening to turn the bag right sides out.
  8. Stuff your bags with cotton batting and then use a whip stitch with dental floss to seal them up. This floss is very durable and will keep the loose burlap threads tightly bound together.
  9. Now add a bit of red thread trim using an embroidery needle if you'd prefer.
       Burr mills were commonly used in early American kitchens. A burr mill, or burr grinder, is a mill used to grind hard, small food products between two revolving abrasive surfaces separated by a distance usually set by the user. When the two surfaces are set far apart, the resulting ground material is coarser, and when the two surfaces are set closer together, the resulting ground material is finer and smaller. Often, the device includes a revolving screw that pushes the food through. It may be powered electrically or manually.
       Burr mills do not heat the ground product by friction as much as do blade grinders ("choppers"), and produce particles of a uniform size determined by the separation between the grinding surfaces.
       Food burr mills are usually manufactured for a single purpose: coffee beans, dried peppercorns, coarse salt, spices, or poppy seeds, for example. Coffee mills are usually powered by electric motors; domestic pepper, salt, and spice mills, used to sprinkle a little seasoning on food, are usually operated manually, sometimes by a battery-powered motor.

Left, The first coffee-grinder patent in the United States was issued to Thomas Bruff, Sr. in 1798.
 Right, English and French coffee grinders in the nineteenth century.
The photograph above shows coffee grinders or burr mills kept in a Museum in Wisconsin.
The photo itself was taken in 1873. On the far right you can see a burr mill similar to the one
we have on display in the Grimm nursery.

Saturday, June 23, 2018

Sew A Security Blanket for A Baby Doll

This baby doll has a kitten security blanket.
       Here is a simple craft that a older brother or sister will enjoy making for the birthday, Christmas stocking, or even an Easter basket of a younger sibling. Teach them a few basic hand stitches: a straight stitch and a whip stitch to complete the project. But you may need to supply enough materials to make more than just one, just encase they need one for their own growing collection of sewing samples.

Supply List:
  • small stuffed animals with heads measuring 1-2 inches across
  • A variety of fabrics with interesting, soft, patterns. 
  • Matching threads
  • Needles and scissors
  • matching ribbons, trims, etc...
Step-by-Step Directions:
  1. Cut off the head of your small stuffed animal leaving a 1/4 inch to turn under with a needle.
  2. Cut two 12"x12" swatches per security blanket.
  3. Position the animal head approximately in the center of one swatch. Make sure that swatch has it's best side facing up where the head will be sewn on top.
  4. Now whip stitch around the neck of the stuffed head, turning 1/4 inch of it's edge under as you sew.
  5. Sew around the head twice so that it is firmly attached.
  6. Turn the wrong sides of both swatches together, one with an attached head and the other without, and sew a 1/4 inch seam around all the edges leaving 2-3 inches open before turning the two sides inside out. 
  7. Use an invisible stitch to close up the opening between the two fabric swatches.
  8. Attach ribbons and fur trims for collars.
Left, I purchased a bag of tiny stuffed animals at the flee market for a few dollars. Right,
the heads have been cut from their bodies so that they may be attached to doll blankets.
Left, the top half of a doll's security blanket. Right, the bottom half of a doll's security blanket.
You may choose to make your doll's security blanket from a furry, metallic, or flannel fabric.
Left, a close up of the chihuahua head. Right, a side view of the chihuahua security blanket.
My youngest daughter's childhood doll holds a quilted security blanket with a chihuahua head.
A red head baby doll cuddles her boxer puppy security blanket.
This baby doll  holds a unicorn security blanket.

More Blankets for Dolls:

The Fur Coat...

Description of Coloring Page: fur trimmed fur coat, china doll dressed for cold winter snow, large brass buttons, giant hat with flowers

Don't forget to drag the png. or jpg into a Word Document and enlarge the image as much as possible before printing it folks. If you have a question about this coloring page, just type into the comment box located directly below this post and I'll try to get back to you as soon as I can.

Forget-Me-Nots And Dolly


Description of Coloring Page: tiny flowers, forget-me-nots, coat for Spring, curly wig, old-fashioned clothes, toddler doll body, Toddler Dolls, porcelain or china dolls

Don't forget to drag the png. or jpg into a Word Document and enlarge the image as much as possible before printing it folks. If you have a question about this coloring page, just type into the comment box located directly below this post and I'll try to get back to you as soon as I can.

Raggedy Ann Stories

Raggedy holds the author's pencil and waits patiently for
her stories to begin. Black and white versions are
produced for coloring by kathy grimm.
Raggedy Ann & Andy Stories Written & Illustrated by Johnny Gruelle
Some stories slightly edited by Kathy Grimm 
 
Preface and Dedication
       As I write this, I have before me on my desk, propped up against the telephone, an old rag doll. Dear old Raggedy Ann!
       The same Raggedy Ann with which my mother played when a child.
       There she sits, a trifle loppy and loose-jointed, looking me squarely in the face in a straightforward, honest manner, a twinkle where her shoe-button eyes reflect the electric light.
       Evidently Raggedy has been to a "tea party" today, for her face is covered with chocolate.
      She smiles happily and continuously.
       True, she has been nibbled by mice, who have made nests out of the soft cotton with which she has been stuffed, but Raggedy smiled just as broadly when the mice nibbled at her, for her smile is painted on.
       What adventures you must have had, Raggedy!
       What joy and happiness you have brought into this world!
       And no matter what treatment you have received, how patient you have been!
       What lessons of kindness and fortitude you might teach could you but talk; you with your wisdom of fifty-nine years. No wonder Rag Dolls are the best beloved! You are so kindly, so patient, so lovable.
       The more you become torn, tattered and loose-jointed, Rag Dolls, the more you are loved by children.
       Who knows but that Fairyland is filled with old, lovable Rag Dolls - soft, loppy Rag Dolls who ride through all the wonders of Fairyland in the crook of dimpled arms, snuggling close to childish breasts within which beat hearts filled with eternal sunshine.
       So, to the millions of children and grown-ups who have loved a Rag Doll, I dedicate these stories of Raggedy Ann. by Johnny Gruelle.

The First Book of Stories:

Read more about Raggedy Ann and Raggedy Andy Doll Types

Friday, June 22, 2018

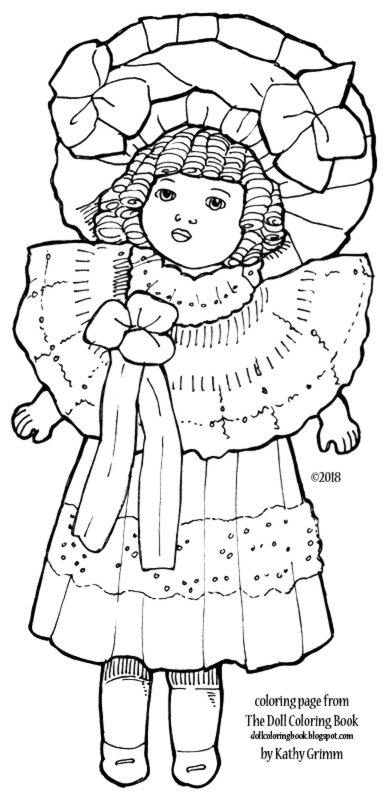
Three Large Bows

Description of Coloring Page: large ribbons, floppy large hat, large collar, lace, curly wig, tiny hands and feet, Toddler Dolls, Porcelain or China dolls

Don't forget to drag the png. or jpg into a Word Document and enlarge the image as much as possible before printing it folks. If you have a question about this coloring page, just type into the comment box located directly below this post and I'll try to get back to you as soon as I can.

Color a Quilted Teddy

Description of Coloring Page: sewing stitches, black nose, quilted and stuffed teddy bear, teddy smile, patchwork

Don't forget to drag the png. or jpg into a Word Document and enlarge the image as much as possible before printing it folks. If you have a question about this coloring page, just type into the comment box located directly below this post and I'll try to get back to you as soon as I can.

Thursday, June 21, 2018

Applique Small Potholders for A Play Oven

I paid only ten cents for these little, child sized potholders in an estate sale. 
Each revealed bright colors after giving them a good scrub. Then, I decided 
they needed a bit of decoration. So I cut a flower, cherries and strawberry 
from a bit of felt and appliqued the designs with hand-stitching. 
With just a few finishing touches (pom poms and seed beads) this 
project was finished in under an hour.
Left, Vintage print fabric potholders in bold colors: blue, green, yellow and red 
will look sweet with our kitchen oven in the playroom. Right,  
an old-fashioned woven potholder made with loops came with the set. 
It is color coordinated with the quilted potholders.
I cut simple shapes of both a strawberry and cherries for my appliques. Then I cut 
brown stems and green leaves from felt. After sewing the designs directly onto the 
tops of my potholders, (using a blanket stitch ) I then attached a few black seed
 beads to my strawberry to mimic real seeds.
I printed a 1930s flower design from my Christmas blog and cut it out to use 
for the applique seen above. I used a finer thread to attach the pom poms and 
seed beads to the center of my design. You obviously don't need to worry about 
plastic or furry trims when decorating pretend potholders!

More Quilting and Applique Crafts for Kids:

The Ribbon Skirt

Description of Coloring Page: ribbon skirt on a Slovakian rag doll, apron, shawl, head covering, rick-rack, stuffed doll, folk art fashions, folk art doll

Don't forget to drag the png. or jpg into a Word Document and enlarge the image as much as possible before printing it folks. If you have a question about this coloring page, just type into the comment box located directly below this post and I'll try to get back to you as soon as I can.

The Sleepy Teddy Bear

Description of Coloring Page: teddy bear, sleepy teddy bear, night cap, night shirt, dressed for bed, velvet nose, droopy eyelids, felt eye lashes, fuzzy ears

Don't forget to drag the png. or jpg into a Word Document and enlarge the image as much as possible before printing it folks. If you have a question about this coloring page, just type into the comment box located directly below this post and I'll try to get back to you as soon as I can.