Wednesday, August 29, 2018

Color Three Rolling Horses


Description of Coloring Page: wheels, pull toys, horses, ponies, antique horses, mane, saddles

Don't forget to drag the png. or jpg into a Word Document and enlarge the image as much as possible before printing it folks. If you have a question about this coloring page, just type into the comment box located directly below this post and I'll try to get back to you as soon as I can.

Thursday, August 23, 2018

Glue Together & Paint Two Night Stands

Try stacking all kinds of shapes in order to configure a contemporary night stand.
Use spray paint to achieve slick, crisp surfaces that look professional.

       I glued together two modern or Mid Century modern looking night stands using two bottle caps, two spools and two empty tin cans that once held bee's wax. You could use a hot glue gun to stick these items together. I used a sticky wood glue. 
       In order for this glue to work on plastic and metal surfaces, it must be adhered to masking tape. So between each surface, I applied the tape. 
       Then I cleaned the tin cans thoroughly before masking them completely and spray painting the bottom halves of my night stands with blue paint.
       Remove the tape from the masked areas to reveal clean, crisp metal finishes and evenly painted surfaces on bottom!

Sew A Set of Towels For A Doll House Bathroom

A new set of towels for Barbie's friends.
       I think that our family's dolls will agree that there is nothing nicer than a new, fresh set of towels! I chose a couple of brilliant azure blue, terry cloth, hand towels from a local dollar store to cut apart for this simple craft.

Supply List:
  • terry cloth
  • trims for hand towels
  • needle and threads to match 
Step-by-Step Directions:
  1.  You may wish to straight stitch the sides of your doll's towels on a machine or by hand. I turned and straight stitched every side for both the bath towels and hand towels. However, I didn't bother with the tiny wash cloths. 
  2. Add a little extra trim to the ends of the hand towels. I decorated each of my solid color hand towels with a white floral embroidered lace. 
  3. The bath towels measure 4 1/2" x 11". The hand towels measure 2 1/2" x 5 " and the wash cloths are 2 1/2" x 3" each.
 Sew more towels for your doll:
I purchased the terry cloth for this set of towels from a dollar store
 it was far less expensive than the terry cloth sold off of a bolt in a fabric store.

Sunday, August 19, 2018

Refinish Wicker Doll Furnishings

The finished result after a couple hours of spray painting.
       In the 1970s and 1980s, it was popular to furnish doll houses with small wicker furniture; the alternative to plastic inflatables. Because wicker is not very strong, much of it did not survive the playtime I suppose.
       I picked the stool, side table and one chair on the first day and then I returned the following day to retrieve the second chair. When visiting resale in the city, I always return the day after I have purchased something in order to see if it is a part of a larger set. Doll furniture in specific, was and still is sold in sets from high end toy stores. By the time these little furnishings are donated by former owners, many pieces may be lost or shifted into multiple bags or boxes.
       I have also discovered that employees in my local resale shops, do not always put sets of doll furniture out on display all at once and they don't always bag these items together. So it is best to keep a close watch for matching items once you have discovered one piece that you want.

Old wicker doll furniture tossed out as trash. These items
will look great once they are repaired and repainted.

Supply List:
  • old wicker doll furniture for upcycling
  • your choice of spray paint 
  • terry cloth towel
  • dark green acrylic paint (for metal leaf design)
  • fabric print to compliment the paint color
  • two buttons
  • needle and thread
  • hot glue gun and hot glue (repair work)
  • cotton or polyester stuffing
Step-by-Step Directions:
  1. Wipe down the old wicker with a clean terry cloth towel; try to remove as much dust and dirt as you can before painting these.
  2. You may need to use a bit of hot glue to reweave some of the old wicker back around the arms or chair legs and tack it into place.
  3. Prepare to spray paint this furniture in an outdoor space. I use large old cardboard boxes to spray paint items in. The clean up of these is easier; all I need to do is toss the used cardboard into recycling after the painting is done. The sides of the cardboard box help prevent the paint from coming into contact with anything beyond the object I am spray painting.
  4. When spray painting wicker, it is best to do so very slowly, all the while turning the doll furniture from side to side, upside down and right side up as the wicker dries. It take many light coats of paint and spraying between the gaps takes time. But the results are like new!
  5. After coating the wicker entirely and letting the paint dry, I then used a small paint brush to apply some darker green acrylic paint to the decorative metal leaves at the foot of the stool. This step highlighted the raised areas in the stamped metal.
  6. To make the two tiny pillows, simply draw a circle pattern for the seats and trace it out onto a fabric four times. Make a seam allowance of 1/4 inch around all four circles before cutting the fabric. 
  7. Cut and sew a straight stitch around the circles with their right sides facing in. Leave an opening for each pillow of about 1 inch wide.
  8. Now clip around each pillow's edge to help turn them inside out properly. Be careful not to clip through the straight seam!
  9. Turn the fabric pillows inside out and stuff them with a little bit of cotton or polyester stuffing.
  10. Use a whip stitch to sew shut the opening.
  11. Thread the needle again with a matching thread and sew a button each into the middle of both pillows.
Left, I use large old cardboard boxes to spray paint items in. The clean up of these is easier;
all I need to do is toss the used cardboard into recycling after the painting is done.
Center, It take many light coats of paint and spraying between the gaps takes time.
Right, the results are like new!
Left, I used a small paint brush to apply some darker green acrylic paint to the decorative metal
 leaves at the foot of the stool. This step highlighted the raised areas in the stamped metal.
Center, I chose to sew tiny pillows for each chair as well. Right, Each pillow has a decorative
 button sewn in the middle.

Saturday, August 18, 2018

DIY Feather Dusters for Your Doll's House

Above are the doll's yellow and lavender feather dusters. These are stored
in the utility cabinet when they are not being used. See them hanging on
the cabinet's hooks here.
       These feather dusters sure come in handy after the dust settles in our doll's house! So much construction going on this month.
       Why not make a few for your collection today? They are easy to make and cost less than a penny to manufacture.
      Feather dusters can be made any size, miniature or playscale. It all depends on the length you make the toothpick.

Supply List:
  • craft feathers
  • toothpicks
  • Sculpey, oven bake clay
  • white school glue
  • white twine
Step-by-Step Directions:
  1. Shape a simple little handle onto the end of a toothpick. Make sure that it encompasses at least 1/2 inch of the toothpick. This will make your feather duster durable.
  2. Use the tip of a toothpick to poke a tiny hole into the end of the handle so that you can tie a small bit of twine on the end for hanging.
  3. Bake these tiny handles in the oven at 270 degrees for 10 minutes. You do not need to remove the toothpicks from the sculpted handles. If these come out with ease, glue them back into the handles after the baking using school glue.
  4. After the handles have cooled, attach feathers to the opposite end of the toothpicks with a little glue and twine. 
  5. Using white school glue and twine, cover the remaining parts of the exposed wooden toothpicks. (see photo above)

Update A Wooden Doll's Cradle

       I picked this small wooden cradle for our fashion doll's house not only because I thought it charming but also because it rocks well without tipping. It is an excellent size, 8"x4"x4", for a Barbie doll's baby. All this piece needed was a bit of updating!

Above, I painted this little cradle using two colors, green and teal, and left a few of it's surfaces stained.
This style of furniture is comely referred to as "two-toned." Although, technically my cradle has three
 colors on it. The word combination "two-toned" refers to the leaving of some surfaces stained
and others painted.
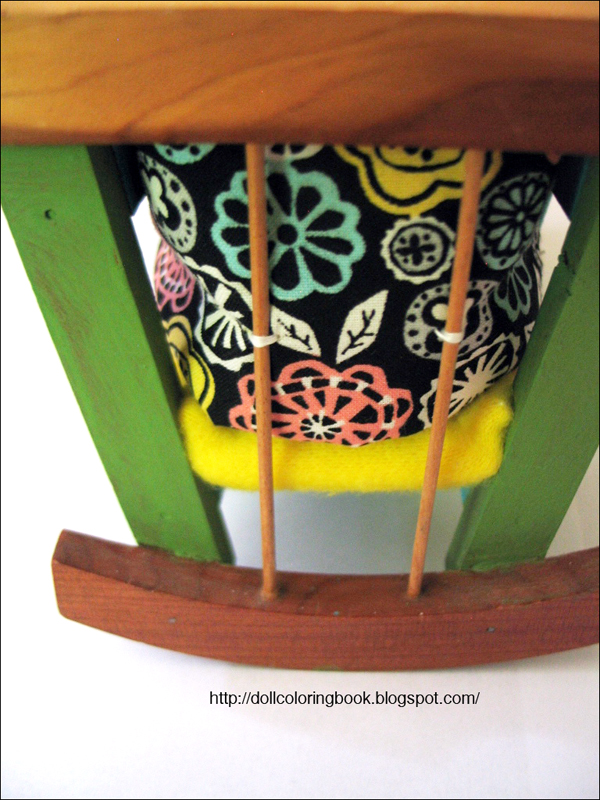
Detail of bumper pad tacked in place. See
the coordinating changing table I crafted to
match this doll cradle for Barbie here.
Supply List:
  • acrylic paints
  • cardboard
  • felt for lining, any color
  • scraps of fabric for the bumper pad
  • fleece for mattress cover, coordinating color
  • needle and thread
  • clear acrylic sealer 
  • sand paper 
  • small paint brush
Step-by-Step Instructions:
  1. Lightly sand the cradle's surfaces to remove dirt, grime and any other sticky or oily residue from the crib. This light sanding will also scratch the surface of the stained crib just enough to help the acrylic paints adhere to it.
  2. Using a small paint brush, carefully coat the different surfaces of the crib with the colors you have selected. It should take three to four coats of paint to cover each surface sufficiently. Remember to apply the paint evenly to avoid messy lumps and drips. 
  3. I painted this little cradle using two colors, green and teal, and left a few of it's surfaces stained. This style of furniture is comely referred to as "two-toned." Although, technically my cradle has three colors on it. The word combination "two-toned" refers to the leaving of some surfaces stained and others painted.
  4. Now you may wish to use a clear acrylic sealer to protect your paint application. Let it dry before continuing.
  5. Measure and fit a piece of cardboard to fit inside the cradle, if your cradle has a bottom made from small wooden slats like mine.
  6. Cut a felt cover for this cardboard mattress the exact same dimensions. Glue it to the top of the cardboard.
  7. Now cut a piece of fleece, slightly larger to cover both the top and bottom of the cardboard. This will provide the doll with a bit of cushion. 
  8. Tuck and whip stitch the edges of the fleece to cover the cardboard mattress. Fit this into the cradle.
  9. To make the cradle's bumper pad, measure the length of four interior sides. Add up these measurements and cut a piece of felt for the stuffing of the bumper pad.
  10. It's up to you to decide how wide the bumper pad will be.
  11. Place the felt piece on top of the decorative fabric you are going to use for the outside of the bumper pad. Cut around this felt piece leaving 1/4 inches for a seam. Do this twice.
  12. Remove the felt for measuring, Turn the two pieces of fabric with right sides together. Sew a straight seam around the two bumper pads, leaving a opening of approximately three inches.
  13. Insert the felt lining and whip stitch the opening shut.
  14. Stitch the ends together if you like.
  15. Now fit the bumper into the little cradle and use a needle and thread to tack it in place.

Tuesday, August 14, 2018

Frugal, Fashionable, Furniture Picks...

       You don't always need to alter, refinish, upcycle etc... every object you pick from a resale, an estate sale or flee market. Sometimes I have picked items that fit right into doll house interiors that look like they were designed for that exact purpose. These items do share one thing in common, however, I did not pay more than $2.00 for each piece and in some cases, I paid much less.

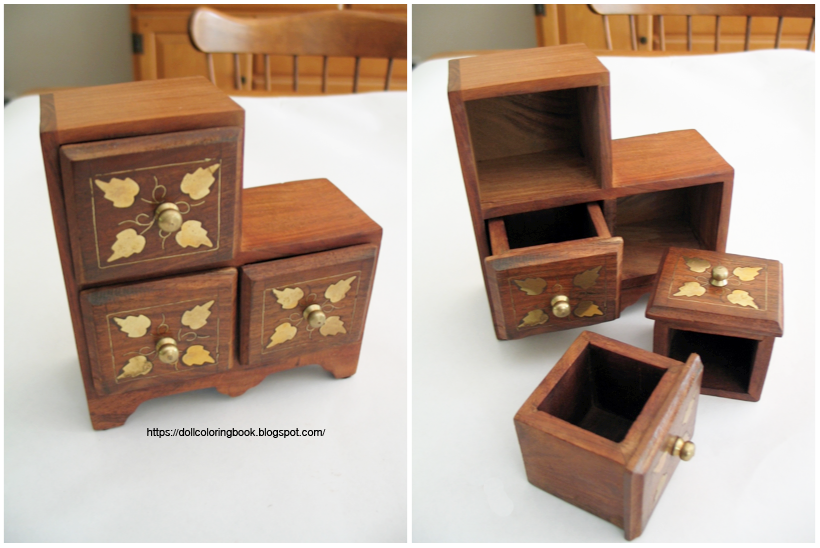
This small, stained, wooden box was perhaps once used for jewelry? It looks like a set of stair-step dresser drawers
 for a doll house. The brass handles and inlaid brass oak leaf design are in perfect condition! I won't be
 altering this piece.
Printed on the inside lid, "Lane Presented by Carol House Furniture St. Louis, Missouri." A cedar box, perfectly preserved with key to lock. This cedar box reminds me of a lovely cedar trunk that my grandmother had at the foot of her bed. Inside, she stored a wedding gown, wedding cake topper and fur cape. It was customary to keep cedar trunks as hope chests prior to marriage many years ago. Then after marriage, a young wife would fill this kind of trunk with her most valuable linens, quilts and fine clothing.  Read about the hope chests young girls kept for their wedding day here.
This dated, wire card or paper file will make a nice storage unit for doll sized paintings.
A delicate wooden park bench sized for fashion dolls will look charming in a park setting or on the doll's back porch.
I can transform this stainless steal, votive candle
 holder into a Mid-Century Modern plant stand
 without changing it's appearance. The base is a bit
 exaggerated but I think it will look fine in the
 Barbie doll house.
Above is a former tissue box cover with detailed fretwork.
I will leave this white but use for the base of a doll's bed.
This wooden container will make a nice storage bin for
the doll's patio gear and athletic equipment.
This baby grand piano measures approximately six inches across. It is not a music box.
It will look very elegant inside one of our old miniature doll houses.
The purchase price at resale $4.00 It is lovely and will remain unaltered.
If you would like to make a miniature piano from start to finish go here to see plans!

Monday, August 13, 2018

Craft a Utility Sink and Hamper for Your Doll's House

I used the wooden shelf paper to cover my utility sink's lower cupboard.

       Our 12 inch fashion dolls will love these latest additions to their laundry room. The utility sink is cut from a bright yellow bottle and so is the doll's hamper. Spot, the pipe cleaner puppy, is waiting to see if the family cat will jump into the hamper to play hide and seek. Little does he know that the giant yellow sink is intended for more than just clothes.

The utility room cabinet and sink have two towel racks
made from tiny, unfinished, wooden spools and dowels.
I covered the counter top with aluminum foil tape to
mimic a stainless steel counter top.
Supply List:
  • cardboard (boxes)
  • sharp scissors, box cutter, Exacto knife etc...
  • shelf paper with printed wood pattern
  • white school glue 
  • masking tape
  • recycled bottle (thoroughly cleaned)
  • buttons for hot and cold water knobs
  • thick, bent wire for faucet
  • fabric for the liner of your doll's hamper
  • needle and thread to match the fabric
  • aluminum foil tape
  • hot glue and gun 
  • old recycled bungee cord
Step-by-Step Directions:
  1. Cover a small box that stands approximately six inches tall with faux wood shelf paper.
  2. Attach with glue a counter top cut from cardboard.
  3. Cut a hole where the spout of an empty, clean bottle top will be inserted and glued into place.
  4. Cover the counter top with aluminum foil tape to mimic a stainless steel counter top.
  5. Hot glue a detached hook from an old bungee cord to act as a tall faucet for the sink.
  6. Hot glue silver and black buttons on either side of the facet to act as hot and cold knobs. 
  7. Hot glue two wooden dowel rods with tiny spools at either end to the box. These will become the towel racks for the dolls utility counter.
  8. To make the laundry hamper, simply line both the exterior and interior of the remaining bottle half with a burlap looking fabric using the hot glue gun. I left a bit of the bright yellow bottle's bottom showing because I think it looks terrific coordinated with the modern sink.
Left, a recycled petroleum bottle is thoroughly drained and scrubbed before being cut apart for this project,
leaving no residue inside or out. Center, cover the box and counter with masking tape for addional strength.
 Right, I recycled an old bungee cord attachment for my faucet.
Left, I cleaned this bottle thoroughly before using it; I just had to have this bright yellow color for our
 doll's utility room! Center, compare the pipe-cleaner pup to the laundry basket. Right, the laundry basket
has been covered with a burlap looking fabric both inside and out.
Sinks for A Doll's Utility Room:

Construct a papier-mâché utility cabinet

       Some of our dolls are very tidy indeed! They have their own cleaning supplies that need to be stored somewhere. So I have made a cabinet from a recycled cardboard to include inside of the laundry room for this purpose. You can make a storage unit any size or shape that you desire. This cabinet is made to color coordinate with the other furnishings in our laundry room.
Left, the box is cut and glued together in the shape of a utility closet. Center, the surfaces/walls are covered with paper.
Right, the cabinet is filled with cleaning supplies, appliances, and other housekeeping stuff.
Miniature things found in our utility cabinet include:
  1. an iron with a cord
  2. cleaning supplies for keeping a doll's house scrubbed and polished
  3. an aluminum dust pan
  4. a broom for sweeping the doll house floors
  5. a mop for soaking up all of those unfortunate spills
  6. feather dusters for clearing away dusty counters, windows, etc...
  7. a bottle of bleach for scrubbing out the bathtub and sinks
Supply List:
  •  a cardboard box 
  • white school glue
  • masking tape
  • faux wood shelf paper
  • yellow scrapbook paper
  • tiny plastic hooks
  • tiny brass bead for the door knob
  • Mod Podge
  • scissors and a box cutter perhaps 
  • Velcro dots
Step-by-Step Instructions:
  1. Using a very sharp pair of scissors or a box cutter, configure the utility cabinet to suit your doll's needs and taste. Add and subtract shelving units and doors as you go. Attach the doors with masking tape on one side. 
  2. Cover the entire box with masking tape.
  3. Use the Mod Podge for applying layers of shelf paper and scrapbook paper to the surfaces. Make sure that you work bubbles out of those applications by using plenty of Mod Podge and a firm even pressure.
  4. Stick tiny Velcro dots to the backside of the cabinet doors to insure these will close.
  5. The tiny plastic hooks, used to hang the dust pan and feather dusters were purchased from a family dollar store.
More Doll House Laundry Rooms:

Saturday, August 11, 2018

Craft a Miniature Ironing Board And Iron

This table top ironing board and miniature iron are handmade especially for our
 12 inch dolls.
 
       I chose to make the type of ironing board you can put on top of a table in order to save space inside of my doll's utility room. The ironing board fits perfectly inside the utility room cupboard. 
       Chose a fun looking felt for your ironing board cover! Our ironing board is covered with a hot pink, bright yellow and white floral print.

Supply List:
  • scraps of felt, the top layer should be attractive
  • cardboard
  • white school glue
  • hot glue gun and hot glue
  • three beads of equal size
Step-by-Step Instructions:
  1. First cut out the shape you would like your doll's ironing board to be from a thick piece of cardboard.
  2. Now lay the cardboard cut out on top of thick felt and trace around the shape with a soft lead pencil. Cut the felt shape out. Both the cardboard pattern and the thick felt should be the same size and shape. Glue one of them on top of the other using white school glue.
  3. Now position the ironing board shape with the cardboard facing up on top of the decorative felt fabric that will be the finished top surface of your ironing board. The decorative felt needs to be turned with it's best side against the surface you are working on. Cut this felt leaving approximately 1/4" excess around the entire ironing board shape. Clip the edges if needed.
  4. Now use a hot glue gun to paste the decorative fabric around the edges of your cardboard cut-out. This process may be a bit messy, but it will get covered up in step 5.
  5. Cut a piece of felt to match the size of your doll's ironing board and glue this to the it's backside. Trim the edges if you need to and then hot glue the tree beads to the three corners of your ironing board to act as legs.
  6. Turn over the ironing board to reveal it's decorative, finished surface.
       Now that your ironing board is finished you can make a tiny iron that your doll can use with it. Below is a list of supplies and step-by-step directions to describe this process. 

Supply List for The Iron:
  • Sculpey oven bake clay
  • acrylic paints
  • tiny brushes
  • cotton twine for the iron's electrical cord
  • one tiny metallic bead 
  • aluminum foil tap
  • a toothpick for shaping the clay
Step-by-Step Directions:
  1. Sculpt the basic shapes photographed below. 
  2. Set your oven at 270 degrees
  3. Assemble the shapes and use a wooden toothpick to smooth away unwanted bumps and tears in the clay.
  4. Prick the bottom of the iron to create steam holes.
  5. Use the toothpick to prick a hole for the cord to be glued into the iron at it's base.
  6. Bake the finished clay iron for approximately ten minutes in a 270 degree oven. Turn the oven off and allow it to cool along with your clay creation before removing it from the oven. This will help the clay to cure tougher. 
  7. I positioned the iron on top of aluminum foil tape and then trimmed around the edge of the iron base leaving a slight amount of tape to fold over the edges of my miniature iron.
  8. Then I pressed the foil tape firmly on the bottom of the iron to reveal the steam hole patterns on the bottom of the tiny appliance.
  9. Then I painted the iron's buttons and sides using purple and blue acrylic paints.
  10. Cut a length of cotton twine for the iron's cord. 
  11. Tuck the twin along with some glue into the hole created for the cord.
  12. You can knot it at the end with a small silver bead if you like.
Left, Assemble the shapes and use a wooden toothpick to smooth away unwanted bumps and tears in the clay.
 Center, Use the toothpick to prick a hole for the cord to be glued into the iron at it's base.  Center Right, I
pressed the foil tape firmly on the bottom of the iron to reveal the steam hole patterns on the bottom of the
 tiny appliance. Right, Then I painted the iron's buttons and sides using purple and blue acrylic paints.

What else can you make for a utility room?

DIY a Rope Basket

       The miniature rope basket is made in much the same way as it's real life version. This basket was designed to move dirty laundry back and forth from the bathrooms to the utility room. A rope basket can look very different depending upon the materials used to craft it. I chose natural colors that will coordinate with many of the colors in our doll's house, but you could use brighter, bolder colors if you wish.

Barbie's pets are romping around in the laundry again!
Supply List:
  • recycle an old plastic cup
  • enough burlap like fabric to cover the surfaces of the cup
  • needle and thread
  • hot glue and hot glue gun
  • twine (I chose a natural looking twine)
  • two beads for handles
Step-by-Step Instructions:
  1. Wash and dry the recycled plastic cup.
  2. Cut out enough fabric to wrap around the outside of the cup with ample amounts to tuck inside the cup and cover it fully.
  3. Hot glue the fabric to neatly overlap the sides.
  4. Thread and needle and sew a straight stitch around the cup bottom edge. Pull the end of the thread taunt and sew it down.  
  5. Hot glue the ends of the fabric flat against the bottom of the cup.
  6. Tuck the left over fabric inside the cup and hot glue this down neatly. 
  7. Hot glue a circle of the fabric to the interior of the inside bottom of the cup.
  8. Now take you twine and begin to turn it round in a spiral shape on the bottom of the cup. Use a bit of hot glue to push it firmly into place. (see photo below)
  9. Keep turning the spiral of twine around itself while adding a bit of hot glue to the outside burlap surface as you go. Twist the twine all the way up the sides of the covered cup until you reach the approximately 1/2 an inch from the top.
  10. Now make the handles of the rope basket by stringing on one bead and then glue a bit of twine to the other side of the basket. String on the second bead handle just opposite to the first on the other side of the rope basket.
  11. Keep gluing and twisting the twine rope all the way up to the lip of the cup to finish the basket.
  12. Clip of the end of the twine and glue it firmly in place.
Left, recycled plastic cup. Center, covered plastic cup in a finer, burlap like fabric.
Right, Now take you twine and begin to turn it round in a spiral shape on the bottom of the cup.
The doll sized rope basket seen from a variety of angles.

DIY a birdbath for a doll's garden

The duck 'floats' on top of the clear plastic
 sheet as though he is swimming and the  grey
papier-mâché pulp makes our birdbath look
 just like a real life concrete version!
       To begin this project, you will need the help of an adult to cut away the birdbath form from a recycled plastic bottle. Include the twist top cap in your cut as well. You can see below that I cut the clear plastic bottle along one of it's seams. The neck of this recycled bottle will become the birdbath's  pedestal. I also cut away the bottom of my bottle to glue to the top of the pedestal. This part will become the birdbath basin.

Supply List:
  • one recycled juice bottle, clear plastic
  • papier-mâché pulp
  • masking tape
  • tiny sea shells
  • hot glue and hot glue gun
  • a recycled piece of plastic sheet
  • a box cutter or sharp Exacto knife or a sharp pair of scissors
Step-by-Step Instructions:
  1. Cut out the parts of your doll's birdbath with adult supervision. This part of the project can be a bit tricky. The plastic bottle has slick surfaces and your cutting tools could slip!
  2. Cover the pedestal with masking tape. I left the green lid at the bottom unmasked because I liked the color of it.
  3. Hot glue the birdbath basin, cut from the bottom of the recycled plastic bottle, onto the top of the pedestal.
  4. Mix together just a small amount of papier-mâché pulp according to the directions on the side of the bag. 
  5. Apply a thin coat of pulp around the outside of the pedestal and also to the underside of the birdbath basin. Let the birdbath dry in the sunshine for a day or two until the paper pulp has hardened.
  6. I cut a circle shape from a second sheet of plastic from a discarded folder to hot glue on top of the basin. This makes the basin look as though it is full of water. Only hot glue the edges of the plastic to the top of the basin.
  7. Now cover the edges of the basin with more paper pulp. 
  8. Push a few tiny shells into it's surface for decoration.
  9. You may wish to spray the papier-mâché pulp surfaces with an acrylic sealer after the birdbath has dried thoroughly in the sun.
Far Left, the recycled lemonade bottle. Use a clear plastic bottle for this craft so that the papier-mâché pulp may
 be seen clearly. Next, is the bottle cut apart so that you can see which pieces of the bottle I chose to construct
the birdbath with. Center, is the dried, paper pulp covered birdbath. Right, the same seen from above.