Sunday, August 4, 2024

Assemble a small button card for a sewing basket . . .

Never throw a button set or single button away!
Collect and organize them on cards or keep
them in a attractive tin.
       Practice cutting flower shapes from colorful or printed scrap paper for this simple sewing basket craft. 
       The printable, just right, includes a tiny pattern for flower petals. You will also need a needle and thread with like colors to sew the buttons onto the card and white school glue to paste the paper flowers to cardstock cut into small rectangular shapes. 
       The process of making button cards like the example shown here, is an  excellent way to organize your duplicate buttons together until you need them. It is also a creative way to give a button collection to friends who loves to sew.
        There are many people who collect button sets just for fun! Buttons may be organized according to style, color, age, or size. However, most people collect them into sets so that these may be sewn together on garments.
       Buttons have become very expensive these days. Sometimes buttons cost more than the fabric they are sewn to. For this reason, I often will cut the buttons from old, worn out clothing that can no longer be worn or thrifted.

Wednesday, July 31, 2024

This paper doll holds safety pins in the sewing room!

An old-fashioned paper doll for your sewing basket. She keeps the
bobbie pins together in one place! Go here to see more paper
 dolls for your sewing collection.
 Click to download the 
largest available size.

       This little paper doll should be hung in your sewing room or on the mirror overlooking a bedroom dresser, wherever you keep your sewing basket, pins and needles. She may even look sweet hanging from the inside cushion of a sewing basket lid. She is the keeper of safety pins you see . . .

Supply List:

  • pretty colors of fancy ruffled crepe paper
  • tacky white glue
  • yarn for hair
  • ribbon for hanger
  • hole punch
  • white poster board
  • safety pins
  •  brown or black marker for the face
  • colored pencils for the skin coloring
  • lace trims

Instructions for Paper Doll:

  1. Swipe and print out the pattern below.
  2. Cut from it the drawn half doll from the printable.
  3. Fold a piece of typing paper in half to trace around the pattern. Make sure to line up the folded edge of the paper with the center cut of the paper doll. This will give you one complete doll when you unfold the paper after cutting it out.
  4. Now trace around your paper pattern on top of white, light weight poster board.
  5. Use a hole punch to make the hole between the paper doll's fingers. This is where you may thread safety pins for the doll to hold. 
  6. Cut pieces of ruffled crepe paper and glue these to the neck for the collar and waist for the skirt.
  7. Draw a face on your doll for her features.
  8. Use the colored pencils to color in the dress, face, slippers and skin.
  9. punch a hole in the doll's head and tie on a ribbon to hang the doll from.
  10. Glue on the yarn hair in any style you like

Monday, July 29, 2024

Craft a Chenille Stem Wreaths

Two different styles of Christmas wreaths made using 
chenille stems for the dollhouse.
       Chenille stem wreaths are perhaps some of the easiest miniature ornaments to make. Every dollhouse needs one or two at least. I've made two versions here with only a few additional supplies. Red, green and white both are sure to be just the things to trim the dollhouse with this coming holiday season.

 Supply List:
  • red, green, and white chenille stems
  • wire for hanging
  • small red pom poms for berries
  • green felt for holly leaves
  • hot glue gun and hot glue

Step-by-Step Instructions:
  1. First, measure the space on the dollhouse wall or door where you would like to hang a festive Christmas wreath.
  2. Braid or twist red and white or green and white chenille stems together to create a pattern with sharp color contrast. 
  3. Then bend the stems into a hoop shape for the wreath(s), making them no larger than the measurements taken in step number one.
  4. You may tie or shape a festive bow using a chenille stem or red ribbon for the braided version pictured on the right. 
  5. Cut holly leaves from dark green felt to glue to the candy cane wreath using hot glue and then glue the red pom poms on top of the leaves afterwards.
More Christmas Wreaths for Dolls:

Chenille Stem Stocking Craft

A finished example of the decorative stocking for a dollhouse at
Christmas time.
       In the traditional Christmas colors: red and white, this vintage stocking would look awesome hanging from a mantel, on the front door of a dollhouse, or hung decoratively on any wall where your dolls need a bit of Christmas cheer.
Supply List:
  • chenille stems (two or three red
  • white pom pom trim
  • one silver metallic chenille stem
  • one white chenille stem
  • light weight cardboard
  • white school glue

Step-by-Step Instructions:
  1. Draw an outline of a simple stocking on a light weight piece of cardboard.
  2. Cut the stocking out and smear a light coating of white school glue over the front side.
  3. Wrap the cardboard cut-out using fuzzy, red chenille stems. Wrap these close together in order to cover all of the cardboard surface. 
  4. Leave a place for a cuff at the top of the stocking for white chenille stem wrap and lettering. Wrap this with white chenille stem first.
  5. Glue on the pom pom trim at the bottom edge of the white cuff.
  6. Shape ''Ho, Ho'' using the red chenille stems and glue these to the white cuff.
  7. Add a bent, metallic chenille stem wire for the stocking to hang from on the dollhouse door or wall or banister.
More Chenille Stem Christmas Crafts:

Thursday, July 25, 2024

How to craft a suitable home for wild ducks and their young...

Plants that grow near ponds and duck-egg nests are just a few hand-crafted toys your child or 
young student can learn to make for this environmentally inspired project.

        Students can assemble a miniature pond environment for miniature toy ducks. Below are some questions that they can learn the answers to while they craft:

These little nature inspired toys can be moved
to any place on our small diorama.
Supply List:
  • Sculpey
  • masking tape
  • pale blue, tan, brown acrylic paints
  • straw or paper grass 
  • paper mache pulp
  • recycled paper egg carton
Step-by-Step Instructions for Crafting A Duck Nest:
  1. Cut individual egg carton cups apart. Clean up the edges a bit with scissors.
  2. Prepare the paper mache pulp according to the directions on the package. Make only a couple of tablespoons of the material.
  3. Fill the cups a bit smoothing out the inside sides with the paper pulp. Let dry.
  4. Glue the straw or paper grass to the outside edges of the pretend nests. Let dry.
  5. Fill the interior with a few natural looking feathers.
  6. Sculpt tiny duck eggs from oven-bake clay. Paint these pale blue for duck's eggs. Put these in your paper-mache nests for the mamma ducks.

Left, the paper mache pulp is pressed inside the recycled egg cup. Right, see the finished duck
nests filled to the brim with eggs. Go here to see more eggs; these are eggs that hens lay.

Sculpt a beaver's lodge and dam for the pond diorama

Left, beaver's lodge. Right, beavers' dam. Both made from twigs and stones found in our yard.

       There are many facts about beavers that parents or teachers can share while young students craft a beaver, it's dam and it's lodge. Children will enjoy learning about the materials a beaver uses to craft their very own safe environments. 

We've added a lodge and dam built by ''beavers''
in the deeper parts of our pretend pond.
 Supply List: for both projects below

  • twigs from your yard
  • paper mache pulp
  • wood glue or hot glue with adult supervision
  • acrylics for painting the paper pulp
  • kitchen foil
  • scrap cardboard
  • masking tape
  • recycled paper egg carton
  • stones
  • plastic plant life (optional)

Step-by-Step Instructions: The Beaver's Dam

  1. Cut a scrap piece of cardboard to the exact size and shape of the pretend dam you would like to construct.
  2. Cover both top and bottom of the cardboard with masking tape.
  3. Hot glue the largest of dry twigs and the small stones to the cardboard. 
  4. Mix together a little paper mache pulp according to the directions on it's packaging. Push this pulp between the sticks and stones. Think of the material as the ''mud'' used by beavers to construct a dam. Let this pulp dry overnight and paint the mud surface of your beavers dam brown. Leave the other elements natural, unpainted if you like.
  5. Tuck in a few clippings, from a plastic plant pick, to stick between the twigs for the pretend beavers to munch on later.

Left, start with a cardboard cut-out. Right glue on twigs to begin with.
 
Left, hot glue on a few small stones. Right fill in the gaps with paper pulp. Once the pulp dries paint it.

Step-by-Step Instructions: The Beaver's Lodge

  1. Cut one paper egg cup from the recycled egg carton leaving as much of the side walls in tact as possible.
  2. Turn this over and glue it open side down on top of a scrap of cardboard. Glue additional scraps from the egg carton lid to cover up any holes in the side walls. In this way, you will make a hollow shelter without openings for the beaver's lodge.
  3. Use masking tape to strengthen the construction altogether. 
  4. Cut a small opening through the bottom of the cardboard for the beaver to enter only if the lodge is picked up from the dry pond. The reasoning for the building of the lodge in this way is to teach students that beavers lodges can only be accessed from underneath the ''water.'' This prevents many invasion of predators like: foxes, wolves and wild cats from entering the water logged lodge and killing the beaver's young.
  5. Next, hot glue twigs from the outside to decorate the beaver's lodge. 
  6. Glue on a few small rocks as well.
  7. Mix together a little paper mache pulp according to the directions on it's packaging. Push this pulp between the sticks and stones. Think of the material as the ''mud'' used by beavers to construct a dam. Let this pulp dry overnight and paint the mud surface of your beavers dam brown. Leave the other elements natural, unpainted if you like.
  8. Tuck in a few clippings, from a plastic plant pick, to stick between the twigs for the pretend beavers to munch on later if you like. This part of the project is optional.

Make the hollow interior of the lodge using a recycled egg carton.

Glue sticks and stones to the top of the egg carton cut-out and then fill in the cracks with paper pulp.

    Learn about the legacy of beavers...

    Wednesday, July 24, 2024

    How to Craft Pond Plants

    finished pond grasses and cattails

           We made three dimensional pond grasses and cattails to enhance our doll-sized pond diorama. Place them in the ''shallow'' paper mache waters where ducks may build their nests and lay eggs during the warm summer months.

    Supply List:

    • recycled milk bottle caps
    • paper: dark green, light green, brown and tan
    • white school glue
    • hot glue gun and hot glue
    • cotton ball
    • thin wire
    Step-by-Step Instructions:
    1. Cut four to five lengths of 3 to 4 inches of the thin wire for each grassland ''cap.''
    2. Unravel a small amount of cotton and wrap this around one end of thin wire. Smooth it into a cattail seed head. 
    3. Paint these brown and set aside to dry.
    4. Cut papers into two to three inch strips then cut grass tips all along each length. It is not important to do so uniformly as these appear random in nature anyway.
    5. Apply white glue at the bottom of each paper strip and wind these together, one after another, inserting the bottom tips of each cattail inside the grasses. Space out the placement of the cattails as you repeat the process using three to four colors of grass-cut paper as you go. 
    6. Squeeze a generous amount of glue into the cap and stand the grass upright inside of it.
    7. Tuck unraveled cotton around the empty parts of the cap interior. Let the grasses and cattails dry.
    8. Tear off pieces of brown paper and dab these with glue. Apply this paper to the outside surfaces of the cap to cover both the cotton and plastic caps. Let the caps dry and harden.

    Left, cut paper grasses in four colors: lime green, brown, Kelly green and gold.
    Center, the paper tufts stand freely on their own, once wrapped and glued about
    themselves. Right, cattail seed heads made using cotton batting
    and white school glue.

    ''Grasslands'' crafted from paper and wire and then glued inside of caps
     may be moved about our paper ''pond'' during play. These will provide
     places for our ducks to swim around and build nests for their young.

    Plant in the shallow waters of our pretend pond.
     
    Research More Native Plants for Toy Ponds Online:

    How to craft a ''pretend'' pond for doll play . . .

    Finished paper mache pond.
          
    Our pretend pond is made using paper mache techniques. This kind of pond may be any size you wish to make it. Depending on the size of your dolls, it could be as large as a yard across or as small as four or five inches in diameter. 
           This example made for our posting here is to be played with at an American Girl doll camp. It is relatively small for 18 inch dolls but quite large for our 5 to 6 inch dollhouse dolls, who will likely inherit it after this summer of doll camps. 
           Although camps teaching Earth science or environmental science are considered 'old school', there is greater need than ever to educate our children on these particular topics. Changes in the planet will affect generations to come for certain and the more young students know about the maintenance of our world, the quicker they will be at adapting appropriate living spaces during times of struggle.
           Ask yourself, what information might a parent or teacher incorporate into this ''pond'' learning activity? Ponds are shallow water homes for many living organisms and in order for these to support life, there must be an abundance of water, space, shelter and food. 
           The first step in teaching about ponds is in the general study of how these water environments occur in nature or how people successfully build a pond habitat. Little children can pretend do this by example with their own art supplies. Copying good habits in play, of course, can and will inspire children to grow into these productive pursuits as they age.
           While you are teaching children about ponds, you can talk about: how deep water looks different from shallow water and how the wind moves across the pond surface to make ripples. 
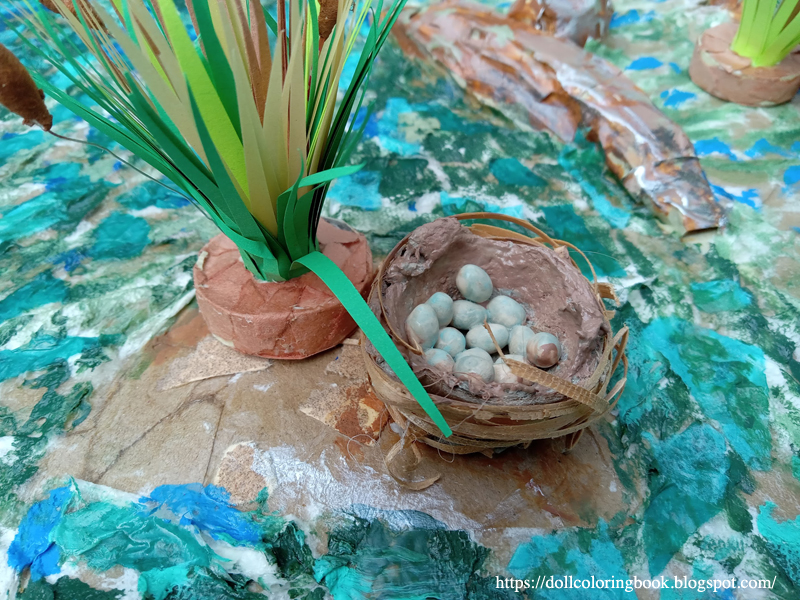
           As the project progresses, talk about the creatures, both big and microscopic that eat, drink and live in a pond. I will include projects after this one that show children how to make wildlife for their ponds.
     
    Left and right, see how I cut and layered cardboard for the sample pretend pond. I also used
    crushed aluminum kitchen foil to shape into boulders.


    Left, cover all of the pretend pond surfaces with masking tape. Masking tape speeds up the process
     of making paper mache items. Tape also creates a waterproof barrier for those fragile materials as
     you work to shape them and paint on them. Right, see how the surface of the pond looks once I
    have layered the tissue paper on top of the Mod Podge. This procedure creates a 'rippled' effect
    similar to wind on water!


    See the ripples in the tissue details.
    Supply List:

    • scrap cardboard
    • aluminum kitchen grade foil
    • masking tape
    • white school glue
    • toilet paper roll or tissue paper
    • acrylic paints: choose ''pond'' colors
    • Mod Podge
    • brown paper bags
    Step-by-Step Instructions:
    1. Cut the first piece of cardboard to the size that you want your pretend play pond to be.
    2. Using white school glue layer multiple pieces of the cardboard to build up the outside edges and several areas of ground within the play pond.
    3. Now cover the entire surface of cardboard with a masking tape layer.
    4. Crush a variety of small and large stones using kitchen grade foil. 
    5. Layer masking around these rocks/boulders and compress the foil on the bottom sides only where these will be glued to the surface areas of the pond.
    6. Glue the boulders to the pond wherever you would like these to be. Let dry.
    7. Crush and tear brown paper bags; brush sections of the pond with Mod Podge or white school glue and layer on the brown paper. Work your way all over the pond surface. Let dry.
    8. An optional step would be to hot glue on any real rocks or plastic plants to the surface areas prior to painting everything.
    9. Wherever there are flat surface areas, cover with a coat of Mod Podge and toilet paper. Gently push the toilet paper down on top of the glue until you see it's surface ''ripple.'' Let these surface areas dry and harden and apply a second coat of Mod Podge.
    10. Now paint some areas of your toy pond with deep colors like blue and green or maybe even a dark brown. These are the places in a pond where the depth of the water is greater.
    11. Paint some of the areas of the water with lighter colors. These areas should be closer to the edges of the pond. This is where to water is shallow and where the small creatures wade into the pond from the shore.
    12. Paint some of the rippled areas near the edges with pale whites and yellows to emphasize the movement of the water. Some areas in your pond could have small ''rapids.'' Wild ponds often have a small stream or underground supply feeding them so that the water is moving at all times
    The pond was then painted using acrylics and sealed with Mod Podge.

    Watch the following video to see how ponds are made in real life, via man or beaver:

    Tuesday, July 23, 2024

    DIY Barbie's Bohemian Bed

            This bed for eleven to twelve inch doll bodies looks much more difficult to make than it actually is. The decorative ''carved'' looking boarders are made with doilies layered together with glue. The upholstery is paper mache, not real fabric, so that it is easier for young crafters to work with. The results can be stunning if you are selective when purchasing the tissue and scrapbook papers to coordinate!
           I chose to use a tissue paper printed with a red and silver arabesque design. The doilies were discovered at a resale shop. These were probably intended to dress up a table for St. Valentines Day. The resulting bed definitely has a Bohemian-like flavor; just the sort of thing that Barbie or many of her friends would prefer in an eccentric looking townhouse.
           Read all of the instructions before beginning one of these on your own. I've included many photographs below for reference. Once you look at these carefully, I think you will understand how simple the design is.
     
    Left, the blanket for our Barbie-sized Bohemian bed is
    made from a recycled crochet sweater backed with
    red satin. Right, you can see a doll lounging in bed.

    Supply List:
    • a package of multiple paper doilies
    • scrap cardboard
    • wood 1'' x 9'' x 13''
    • masking tape
    • white school glue
    • decorative scrapbook papers
    • one small can of spray paint to coordinate with paper
    • Mod Podge
    • decorative tissue paper
    • plain white tissue paper
    • twine
    • fancy laces/trims
    • fabric scraps for blanket and pillows
     Step-by-Step Instructions:
    1. Cut wood scrap into two sides 9'' long and two more sides 13'' long. 
    2. Cut cardboard to fit inside of this rectangular shaped bed. Glue it all together to reinforce the platform.
    3. Cut, glue and reinforce the platform with additional cardboard as needed.
    4. For the headboard, cut and stack the doilies with thin layers of glue between. Removing the interior papers to create a edge piece only. You will also be cutting a portion of the doilies away at the bottom to create a straight bottom edge. See the photos below.
    5. Do the same for the footboard only make it smaller.
    6. Take the stacked and glued doilies and trace around these on top of cardboard to give both the head and footboards backing. Extend the lower cardboard cuts approximately five inches longer than the doily cuts. 
    7. The mattress frame is glued between the headboard and footboard, just beneath the doily cut-outs. What is left below the mattress frame becomes the footing for the bed.
    8. Take the bed outside, set it on newsprint or inside of a box and spray paint the doily elements. Let it dry.
    9. Use layers of masking tape and decoupage papers to finish off the exposed cardboard around the painted doily elements. I originally did this in the reverse because I did not yet know how I wanted the bed to look. However, it is best to spray paint first so that you will have less work to do in the end.
    10. Now it is time to craft the ''tufted'' parts of the headboard and footboard. Crush the plain white tissue paper into ''pillow'' like shell shape. Glue these in place with white glue and finish the outside surfaces with masking tape. You can observe below that I also glued a twine between each section of the shell to hold them in place while I worked, and also did all of my tufting on additional cardboard scraps that fit inside of the cut-outs beneath the doily pieces. 
    11. Decoupage the tufted paper inserts made to look like upholstery using fancier tissue paper. 
    12. Glue these pieces in the holes cut-out beneath the doilies. 
    13. Brush on Mod Podge to finish all paper surfaces. 
    14. Cut lengths of lace trim to glue along the sides of the bed. These will mimic dusters for the bed.
    15. The decorative paper on top of the platform mimics sheeting for the bed.
    16. Cut and sew a fancy blanket and pillows for the bed. I cut an old sweater for this Barbie-sized bed and backed it with red satin scraps. 
    17. I chose to use the same method to make tiny decorative pillows in red and white. Sew lace trims on top of red felt or wool squares.
    Left, the platform for the bed, headboard and footboard prior to gluing all three components 
    together. Right, detailed photo of stacked and glued doilies. 
    The 10 - 12 inch doll bed from multiple angles.
    See the decorative scrapbook paper used to represent the sheets on the bed.
    Detailed photos of the spray paint applications.
    Above, you can see how I shaped the inside tufted tissue paper to look like a
    seashell design.
    The bed's dusters are permanently attached along the sides with hot glue. I used red satin
     and decorative lace panels to make these.
    Detailed photos of lace pillows and coverlet for the bed linens.
    The bed completed without linens.

    More Lovely Linens for Barbie:

    Monday, July 22, 2024

    Cut a foam hand mit for your doll's school spirit!

    Finished and ready for game night.
           When attending a sporting event, you can take a doll to cheer on your favorite team using the following hand mit. 
           Just wrap a bit of masking tape around the doll's hand to help her hold her own foam hand mit and your good to go!

    Craft Supply:
    • foam sheets in the colors of your team
    • printable to trace around pattern (below)
    • tacky white craft glue
    • permanent ink marker
    • Popsicle sticks
    • cardboard scraps

     Step-by-Step Instructions:

    1. First you will need a hand pattern with the pointing finger up, representing the ''#1.'' There is one below that I have drawn. Click on the photo and trace around the hand shape lightly with a pencil.
    2. Cut the same shape from a scrap piece of cardboard.
    3. Mount the shape to the end of a Popsicle stick using tacky white glue. Let dry.
    4. Now glue this hand shape to a sheet of foam paper on one side first. Let dry and cut out the mounted mit.
    5. Turn the hand mit over and repeat steps for the opposite side.
    6. Take a permanent ink pen and draw the fingers, outline the edges and write ''Go Team'' on the wrist of the foam hand mit. Your doll can support her school team using the school colors in foam for this craft.

    Left, cardboard cut-outs of number "1" hand signal for mit. Center, gluing the template onto
    foam sheets. Right, a drawn pattern for the mit that students may copy/trace.

    Sunday, July 21, 2024

    Flossie Floats a Boat and Builds A Raft

      Dear Girls and Boys:

           Flossie and her animal friends are into such much mischief this time. She never has an ordinary day with all of her fun loving friends. Mamma has given Flossie the dirty cloths to launder in the backyard. But, she'll do much more than the laundry; wait and see...

    Sincerely, 
    Helen Nyce
    (The original letter from the illustrator has been modified.)

           ''Read'' with your eyes the series of events from top to bottom, left to right, to discover what happens to Flossie and her little companions below. Then, write in your own words a brief descriptive narrative describing based upon what you see. Below is a introductory sentence to help student begin there own narratives...

           Flossie doesn't just want to wash clothes; she wants to have more fun than that in the water.

    Click on image to download largest jpg. size.

           Over 100 years ago, Helene Nyce organized children's writing competitions for The Ladies' Home Journal. The magazine editors would include her silhouette cuts to illustrate a series of adventures for a little girl named Flossie. Children would then write a short story to accompany the illustrations and submit it through the mail to win a prize.

    Flossie Plays School With Her Friends

     Dear Girls and Boys:

           Flossie Fisher has to study very hard indeed to be able to teach her pets all she thinks they should know. I know all of you can write good stories this month, perhaps better than ever before, for most of you go to school yourselves, and I am sure all of you play school. I am very glad, though, to believe that there are no children in the world as naughty as one of Flossie's pupils was!

    Sincerely, 
    Helen Nyce
    (The original letter from the illustrator has been modified.)

           ''Read'' with your eyes the series of events from top to bottom, left to right, to discover what happens to Flossie and her little companions below. Then, write in your own words a brief descriptive narrative describing based upon what you see. Below is a introductory sentence to help student begin there own narratives...

           Flossie rings the bell to announce the beginning of the school day!

    Click to download or view the largest version.

           Over 100 years ago, Helene Nyce organized children's writing competitions for The Ladies' Home Journal. The magazine editors would include her silhouette cuts to illustrate a series of adventures for a little girl named Flossie. Children would then write a short story to accompany the illustrations and submit it through the mail to win a prize.

    Saturday, July 20, 2024

    How to make a vintage Coca-Cola machine...

    Left the before photo of a simple box to be transformed into something special. Right, the finished,
     old-fashioned soda pop cooler. The drinks are kept cool at any public location where folks may
    need a refreshment. 

             Our doll's vintage Coca-Cola machine is an old-fashioned bottle dispenser/refrigerator. When you insert a pretend coin - the side door unlocks and a ''doll'' may pull a drink from the rack. Of course, this is all make-believe, but our dolls don't mind that at all.
           Supplies you will need to make this craft are: a tall narrow box (ours measures 3 1/2'' x 3'' x 10''), masking tape, white school glue, red, black and white paper, silver metallic tape, and finally a few vintage Coca-Cola stickers. The stickers are available all over the web; I had no difficulty in finding these at ebay. 
           Coca-Cola made a multitude of vending machines in many different sizes. So your box may be of an entirely different size/proportion than the one I made for our 18'' doll Diner.
           If you wish to create personal crafts without worrying yourself over copyright theft, purchase the craft materials that are generated by company contracts with merchants. In this way, you will be complying to the law and your crafts will take on the professional appearances of those items you wish to reproduce for your dollhouse or doll playsets. 
           As you can see from my photos, I simply glued layers of cardboard together on my box in order to mimic the general features of an old-fashioned vending machine. Then I covered these areas in masking tape, colored paper, and stickers before Mod Podge was applied for the final coat.
           Older designs for Coke machines tended to have rounded corners and red and white graphics. The mechanical features like a coin slot, a glass door, or the kick-plate at the bottom of the machine where often made from polished stainless steal. All of these features I covered with metallic tape to emphasize their shiny silver properties. 

    Thursday, July 18, 2024

    How to make a doll's turntable for your 80s and 90s doll fans

    I was thrilled to come across this product while surfing ebay.
     A set of coasters that look just like old-fashioned records that
    came on a realistic looking turn table! Wow, a perfect faux,
    music themed item; so easy to convert it into a photo prop for
    our doll themed blog. Remember, the manufacturer says this
    is not a toy and the parts are not intended for play. A teenager
    or adult could include this craft inside of their doll collections
    but a small child should not be led to believe that it is safely
    assembled for general play. If the small parts broke, these 
    could be choked on.

           Sometimes I stumble across items not intended for play that would make perfect photo props and this is a prime example of one of these. An 18'' doll-size turn table; manufactured and marketed to be used as coasters beneath a glass. 
           Ironically, the records meant to be coasters have a hole in the middle so liquid can seep through and damage a table anyway? Well, I'm not going to use these for their original purpose so, it won't ultimately matter to me. If you order this set through the mail you will get the black plastic turntable only with six faux records. The records are very heavy and durable. The tonearm looks very real and swings easily over the top of the records.
           If you lived during the 1980s or 90s you would probably play your music at home using a turntable just like this one.
           I chose to make a set of speakers to go with the turntable out of wooden blocks, but small boxes or stacked cardboard cuts may be fashioned into a set of these just as easily. 
           Speakers during the 80s and 1990s came in all different sizes. So crafters could elect to make much larger ones than those pictured here if they prefer.
           I chose to use the plastic woven sheeting purchased from a garden center to mimic the speaker grill cloth stretched over the audio components; I have a roll of it left over from other projects. There are other materials like this one that are common and easy to recycle. The plastic woven bags used to package veggies in the grocery store may be upcycled into crafts like this one. The nicest packaging is often used to protect and redistribute garlic cloves. Crafters can use this alternative to save money if they do not have what I used for my doll speakers. This plastic, woven bag may be painted in advance of use with acrylic paints so that it matches the color you need, but you must stretch it first and then lay it on top of a piece of wax paper to dry.

    Supply List:

    • scrap cardboard
    • 2 identical blocks (mine are approx. 3'' x 1 1/2'' x 1 1/2'') or substitute 2 identical boxes for the dolly speakers
    • woodgrain scrapbook paper
    • masking tape
    • white school glue
    • hot glue and hot glue gun
    • plastic weave (purchased from garden center)
    • one package of vinyl coasters (found on ebay or somewhere else)
    • black acrylic paint
    Step-by-Step Instructions:
    1. Measure the turntable and then cut several pieces of heavy cardboard approximately 1/2'' larger for a platform. The turntable may be glued then directly onto the cardboard platform using hot glue. 
    2. Decoupage the platform using white school glue and woodgrain paper.
    3. I decoupaged this same woodgrain paper to two identical wooden blocks to make my dolly speakers. 
    4. Then I cut a frame for each speaker from cardboard and attached the plastic weave to the backside of the frames using masking tape.
    5. Paint these frame black to match the plastic weave and attach them to the front of each ''speaker'' using  

    Left, see speakers in progress. Center, the vinyl coasters ordered from ebay. Right, the coasters
    look exactly like real records only much smaller, perfect for an 18'' doll craft.

    More About Music Sound Systems:

    Silver and Turquoise: A Story of Navajo Jewelry

    Navajo bowguard.
           A Navajo native silversmith sat in the shade of a gnarled juniper tree, fashioning a bowguard for his son. He had bought silver and a fine piece of sky blue turquoise from the white man at the trader's store. For many days he had thought about the shape and design of the ''gato."
           With his chisel and awl the smith carved the design in a flat piece of sandstone. He took another flat piece and made a hole in the middle of it, and, after greasing the stones with some mutton fat, tied them firmly together.
           He melted the silver in an old tomato can over a hot fire of juniper charcoal and, grasping the edge of the can with a pair of tongs, slowly poured the liquid into the hole at the top of the mold. After several hours, when the metal had hardened, he carefully separated the two stones and lifted out the bowguard. The work was well done. Now he had only to file the rough edges and polish the silver to satiny smoothness with sand and ashes. With a tiny strip of silver he fastened the turquoise in the center of the bowguard. The father smiled. His son would be proud to wear such a fine gato when he went rabbit hunting on the desert. The boy would wear it on his left wrist, strapped on with a piece of leather, so that when he shot an arrow from his bow the bowstring would twang against the hard metal and not cut his arm.
           The man's own bowguard was worn thin from many years of use but it still gleamed against his brown skin. He had watched his father make it long ago, and he had learned how to use the tools and work the silver.
           He had made beautiful bracelets and rings and earrings for his wife and children and for himself, and little flat buttons to decorate the bright-colored velveteen shirts that they wore. He had also made belts with round flat pieces of silver, called ''conchas," fastened to them, and fine necklaces of hollow round beads with a crescent-shaped pendant, the ''naja," hanging from the bottom. Between the beads hung silver ornaments shaped like tiny flowers.
           He did not often cast the silver in molds as he had done in making the bowguard. Usually he hammered the soft metal into the shapes he wanted and carved or stamped designs on them. In some of the jewelry he set pieces of turquoise. Turquoise was a sacred stone and every Navajo wore a piece for protection from evil. Their ancestors had made necklaces and earrings and other ornaments from turquoise hundreds of years ago.
           The man's grandfather used to tell him stories of the time when the Navajos did not wear silver jewelry. That was before the year 1850 when Atsidi sani, ''The Old Smith,'' had learned how to forge iron and silver from a Mexican metalworker. After he had mastered the craft he had taught others.
           Many Mexican people lived in the southwestern United States at that time and the Navajos copied the silver ornaments that the Mexicans wore, the buttons and tiny ornaments shaped like pomegranate fruits worn on the outsides of the trouser legs, and the flashing bridles on the horses. The Navajos did not wear trousers, so they strung the buttons and pomegranate fruits on strings and wore them as necklaces.
           From their neighbors the Plains peoples, who lived on the grasslands farther east, the Navajos got bracelets and rings and belts made of silver, copper, or brass. The Plains Indians did not know how to make these things themselves, but got them from the American traders in exchange for furs. The white men knew that the natives liked these shiny ornaments, and in the big cities of the eastern United States there were metalworkers who made them especially for trade with them. At first the Navajo silversmiths copied the white man's jewelry, but soon they began to create their own shapes and designs.
           Besides being lovely ornaments the jewelry was useful as money. In fact, most of the early pieces were made from Mexican and American silver dollars, melted or hammered into the desired shapes. The traders would accept a ring or a bracelet in exchange for food. And if sometime later a Navajo wanted his ring back, he would bring a sheep or a fine blanket woven by his wife and exchange it for his piece of jewelry. Even nowadays the Navajos pawn their jewelry this way when they are poor and buy it back when they can afford to.  Hambleton 

    Wednesday, July 17, 2024

    The Fish That Children Catch

    Fresh water, sun fish from North America.
           Have you gone fishing this year? If you have, perhaps you have caught little, round, spotted fish, long thin, silvery fish and plump green and yellow ones; but do you know even their names? 
           Many of the fish caught by boys and girls are the little round fellows we know as sunfish. There are a number of different kinds of sunfish to be found in the Midwest; and perhaps the most popular of all is the pumpkin-seed or sunny. These fish grow to a length of eight inches; but most of those that reach a boy's string are not more than four or five inches long. What the pumpkin-seed lacks in size is made up in color; for it is one of our most beautiful fish. The green of its back shades into a delicate blue on its sides and the blue, in turn, blends with the orange-yellow of its stomach. Its cheeks are orange streaked with blue; a dot of bright scarlet marks the lower part of the gill cover; and scattered all over its body are orange-red spots. The pumpkin-seed can be caught in nearly all clear brooks, ponds and lagoons; and it will bite on almost any kind of bait.
           As well known as the pumpkin-seed, but far more important as a food fish, is the bluegill. It, too, belongs to the sunfish family and has the round, flattened body and shiny scales characteristic of that group. The bluegill's body shades from dark green above to light green or white below; and the delicate blue of its gill covers and cheeks gives it its name. On each side near the head is a spot of rich, velvety black. Bluegills are the largest of the sunfish. They sometimes reach a length of fourteen inches and a weight of one and one-half pounds. The best place to fish for them is off the edge of a sandbar where there is a patch of water weeds. The fish go in rather large groups or schools and where one is caught there are almost sure to be others. The best baits for them are angleworms and grasshoppers; but they will take many other kinds.
           A third plentiful sunfish in the smaller lakes and streams near Chicago is the rock bass. Like the bluegill, it lives among the plants found in clear, cool water or hides among the stones of rocky bottoms. Some boys call it red-eye or goggle-eye because it has large red eyes. Its body is light green banded by darker green streaks. In the spring, the father fish can often be seen near gravel or sand bars. There he hollows out a nest and, after the mother fish has deposited her eggs, remains near it protecting the eggs until they are hatched. Any kind of bait may be used in fishing for the rock bass; but it seems to relish small minnows, grubs and angleworms more than anything else.
           Two other sunfish which you may catch are the warmouth and the green sunfish. The warmouth has red eyes like those of the rock bass; but it is much darker in general color and its scales are often tinged with red. It is found in shallow, mud-bottomed streams and lakes and its flesh is apt to have a muddy flavor. The green sunfish is a beauty. Most of its scales are marked with a sky blue spot edged with gold; and, at a distance, these colors blend to a bright, brassy green. Its sides are sprinkled with dark spots and its cheeks are striped with narrow blue lines. Like the other sunfish, it can be caught readily with angleworm bait. It is not an important food fish; for it never weighs more than four or five ounces.
           One of the finest fish of our area and one as easily caught as any of the sunfish is the yellow perch. It is valued by older fishermen as well as younger ones; for it grows to a length of fourteen inches and a weight of two pounds and it is an excellent food fish. The yellow perch's body is longer and narrower than that of a sunfish. Its back is green, its sides are yellow and its stomach is usually white. The upper fins are green and the lower fins, red or orange. The perch bites on almost any sort of bait in practically all of the lakes of our region.
           From the piers and docks jutting out into Lake Michigan, many lake herrings are caught each spring and fall. The herrings spend their winter and summer in deep water where they are caught in nets by commercial fishermen. In the spring and fall, they come in to shallow water and there may be caught with hook and line. They are slender, silvery fish and resemble somewhat their large and important relative, the whitefish, although their own weight seldom exceeds two pounds.
           The sunfish, perch and herring all wear an armor of shining scales. Bullheads are protected only by their tough skin. Their large head, wide mouth, curious barbels or whiskers and their dull color make them the homeliest of our fish; but they are, none the less, the favorites of many young fishermen. Perhaps it is because they are plentiful in almost every pond, small lake, water-filled quarry and sluggish stream and because they usually hook themselves firmly when they take the bait. Cockrell


    Flicky Flies shows the fish in the rivers in and near Chicago.

    Lovely Floral Still Life Paintings...

    Lovely geraniums in many colors: lavender, pink, red, magenta inside of a wicker basket.

           These lovely, old-fashioned floral paintings may be resized into any proportions needed, printed on. home computer and framed for hanging in a dollhouse.

    Delphinium in many shades of purple and blue in a glass vase.