 |
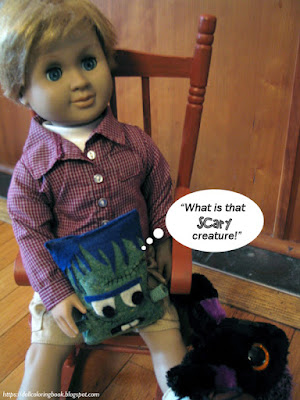
| Monster pillow wonders, 'What is that scary creature!' |
Even though this project is a no-sew project, you may still need an adult to help you with it, depending upon your age and experience.
Read all of the instructions and look closely before beginning. Ask mom or dad to help you with your first attempt. Soon you will get the hang of it.
When working with an iron or hot glue, have adults present and helping.
Supply List:
- green fabric scraps
- double sided adhesive tape
- fabric glue
- stuffing of some kind: pellets, cotton etc...
- small amounts of felt: blue, black and white
- fingernail scissors or tiny Fiskars scissors
- black thread and needle for scares (optional)
Step-by-Step Directions:
- Cut a 3 1/2" x 10" rectangle from green scrap fabric that you have for this no-sew pillow project.
- Apply a double sided adhesive tape or fabric glue to the right sides of your green rectangle. (Remember the right sides are the front parts of a fabric.)
- Fold the rectangle in half with the adhesive strips facing together and iron the pillow case shut. You may use the glue adhesive and omit the ironing, but wait for the glue to dry overnight before turning the pillow inside out.
- Take a sharp small set of scissors and cut a small 1" opening on the front of your pillow's face.
- Turn the pillow inside out. Now the right sides of the pillow are on the outside and the edges are turned neatly inside.
- Push cotton balls or plastic pellets through this opening to stuff your small pillow.
- Cut a strip of your fabric to insert into this open hole and glue it shut with a glue gun. I used the back side of the fabric facing out through the hole to make the surface where my monster's face looks scared more obvious. (see photos below)
- Cut small stripes of the green fabric and roll these up with a bit of fabric glue or hot glue to make the bolts for the monsters neck/head. These are the electrodes that Dr. Frankenstein plugged in electricity to bring his monster to life.
- Glue these hardened fabric bolts to the side of your monster pillow's head.
- Cut blue felt fabric hair and eyebrow to glue to the monster's face. (for front and back, See photo below to copy if you'd like.)
- Cut out eyeballs, mouth and buck teeth from the black and white felt. Glue these down using fabric glue.
- Now you can add some black scare seams with a needle and thread if you want.
 |
| Left, Push cotton balls or plastic pellets through this opening to stuff your small pillow. Right, Cut a strip of your fabric to insert into this open hole and glue it shut with a glue gun. |
 |
| Front and backside of my no-sew Frankenstien's monster pillow. Wow what a mouthful. I think he needs a few black scare stitches before he's done. |
 |
| What is this Frankenpillow's story? It looks like these two are up to no good! Is the spider taking him for a ride or taking his seat? |


No comments:
Post a Comment
Thanks for your thoughts. All comments are moderated. Comment spam is not published here ever. Have a good day!
Note: Only a member of this blog may post a comment.